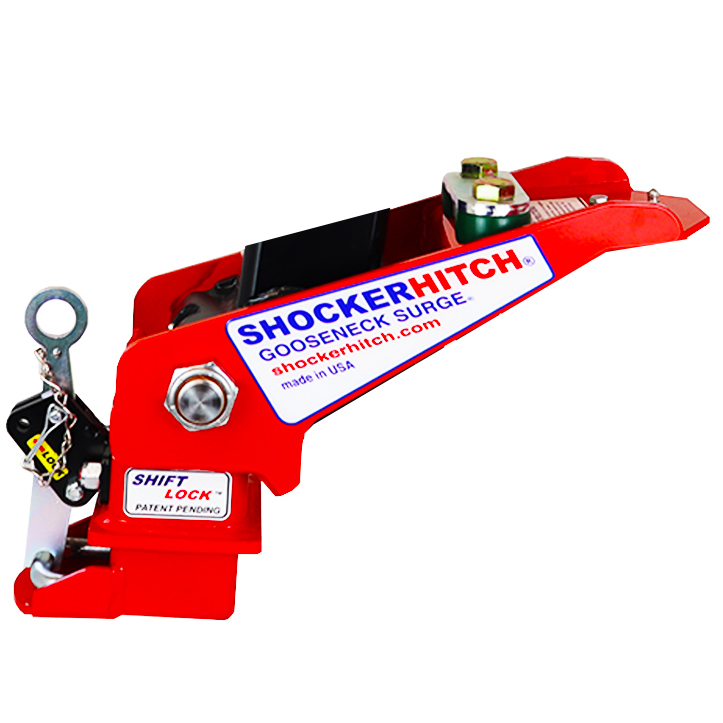
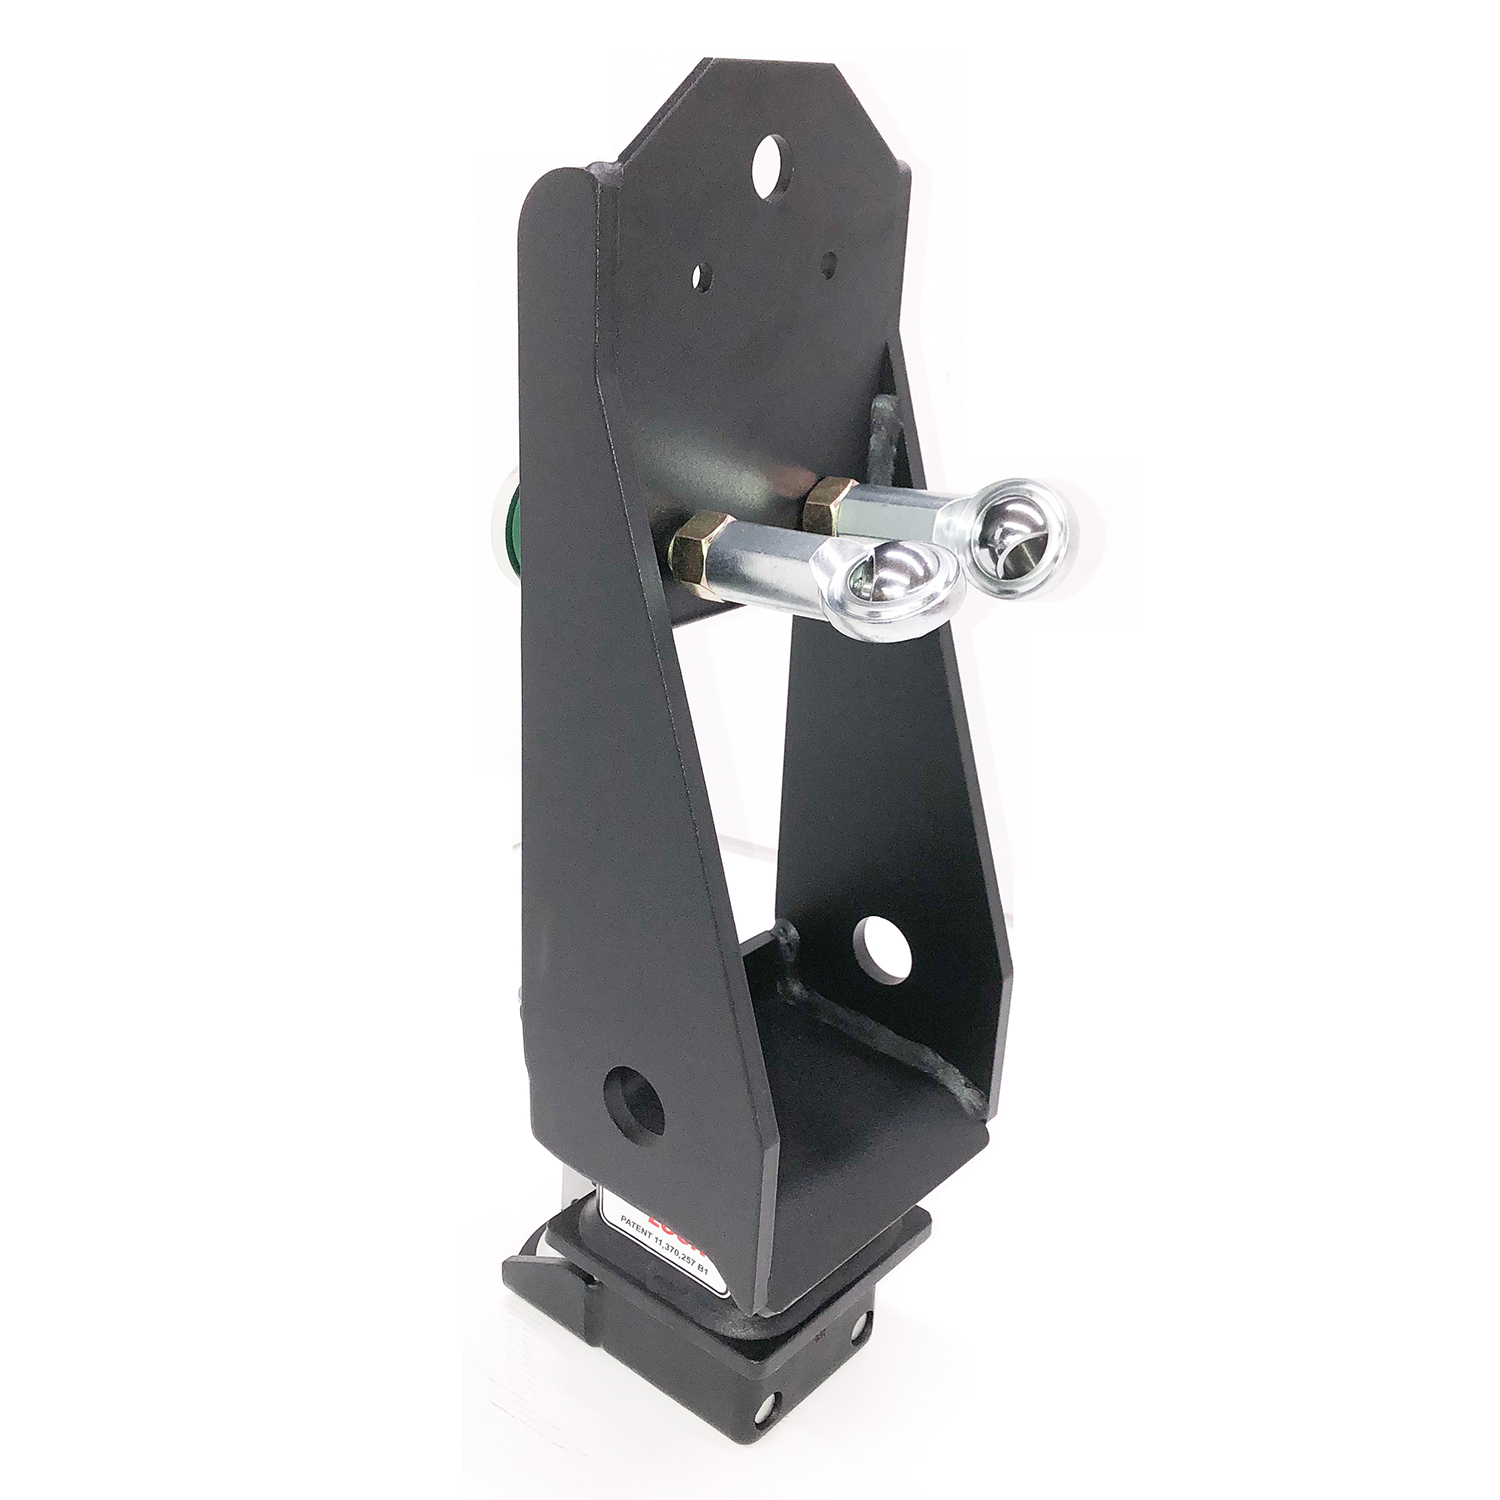
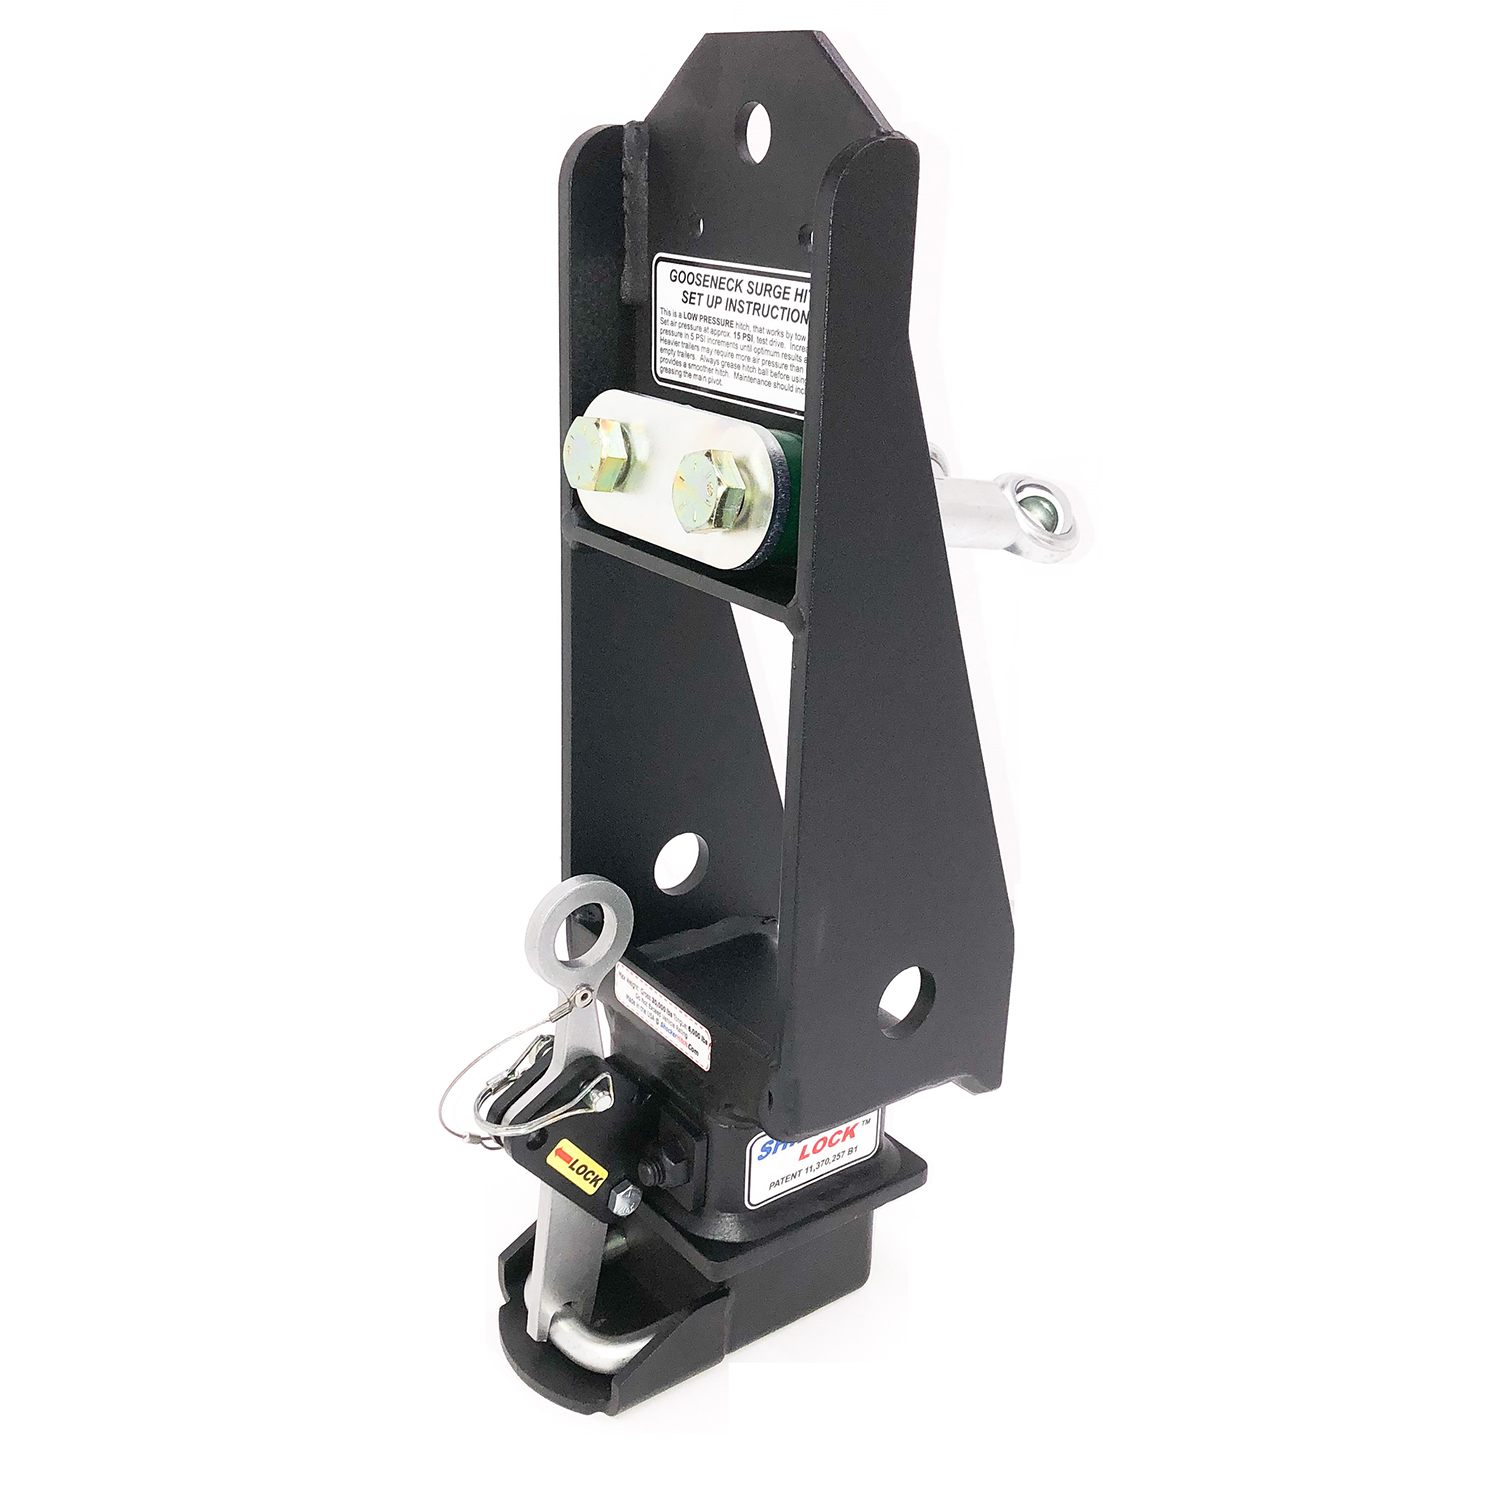
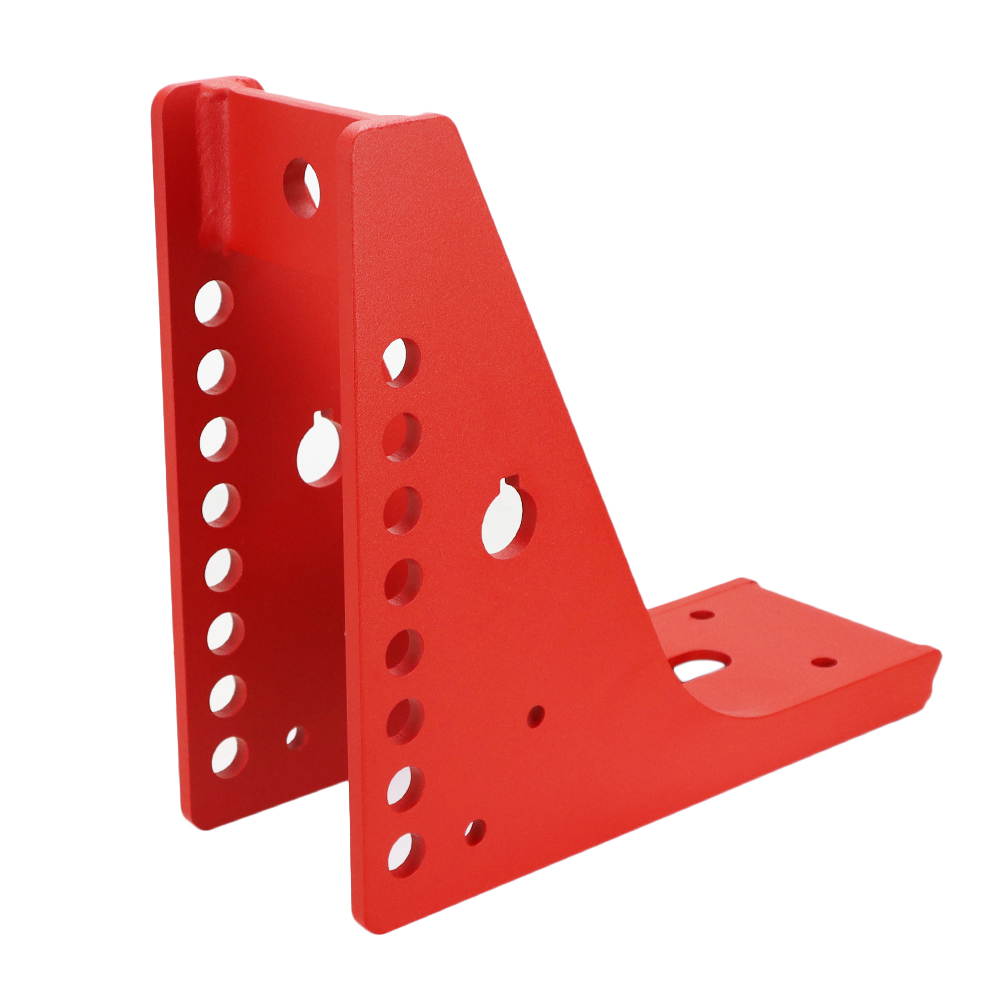
Replacement Shocker Gooseneck Surge® air hitch main frame.
It is the outer red frame on the regular goose air hitch and it is the outer black frame on the goose air with 9″ extension coupler.
Only fits Shocker Gooseneck Surge® air hitches.
Shift lock Options are 30,000 for 2-5/16″ balls or 40,000 lbs coupler for 3″ balls.
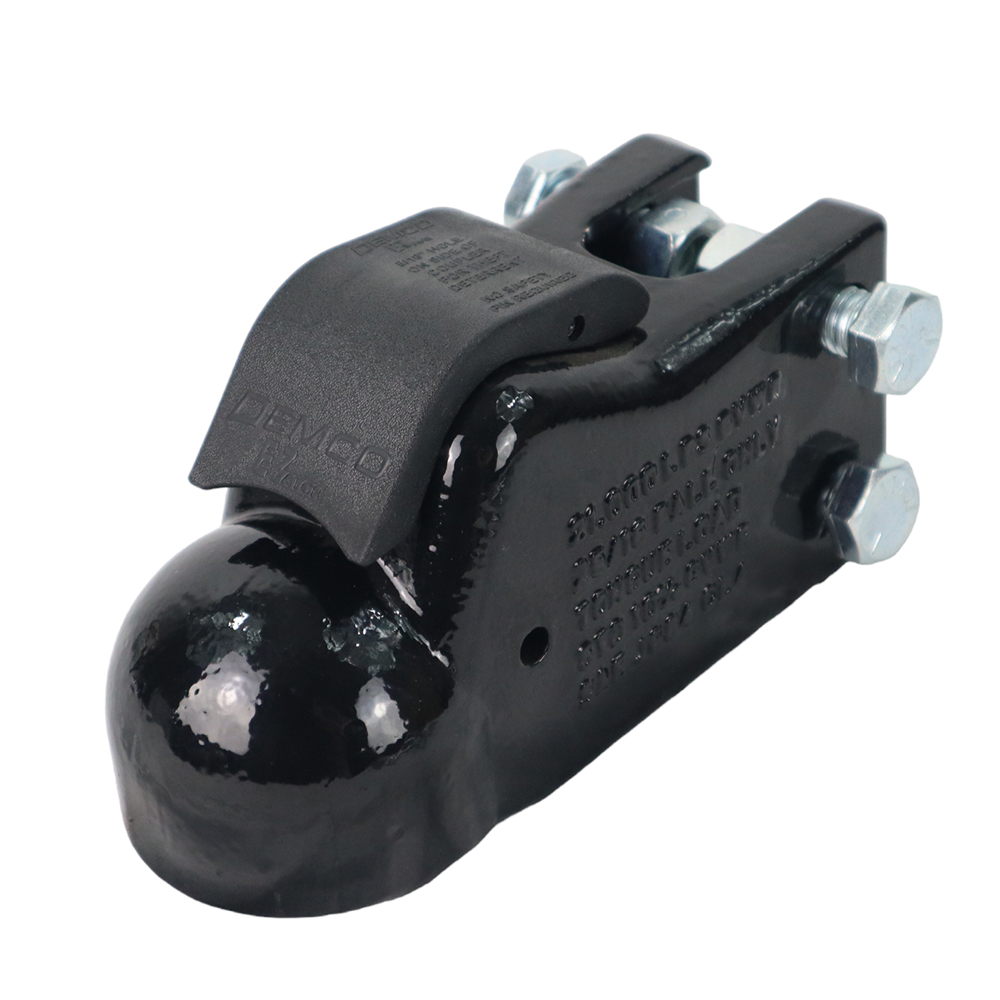
Demco coupler options are for 2-5/16″ ball.
Kingpin options are for 30,000 or 40,000 lbs,
Does NOT include inner tube stem, pivot bolt kit or bushing kit.
Replacement Shocker Gooseneck Surge® air hitch main frame. It is the outer red frame on the regular goose air hitch and it is the outer black frame on the goose air with 9″ extension coupler. Only fits Shocker Gooseneck Surge® air hitches. Includes the Shift lock 30,000 lbs coupler for 2-5/16″ ball, Shift lock 40,000 lbs coupler for 3″ ball, Kingpin or Demco coupler for 2-5/16″ ball.
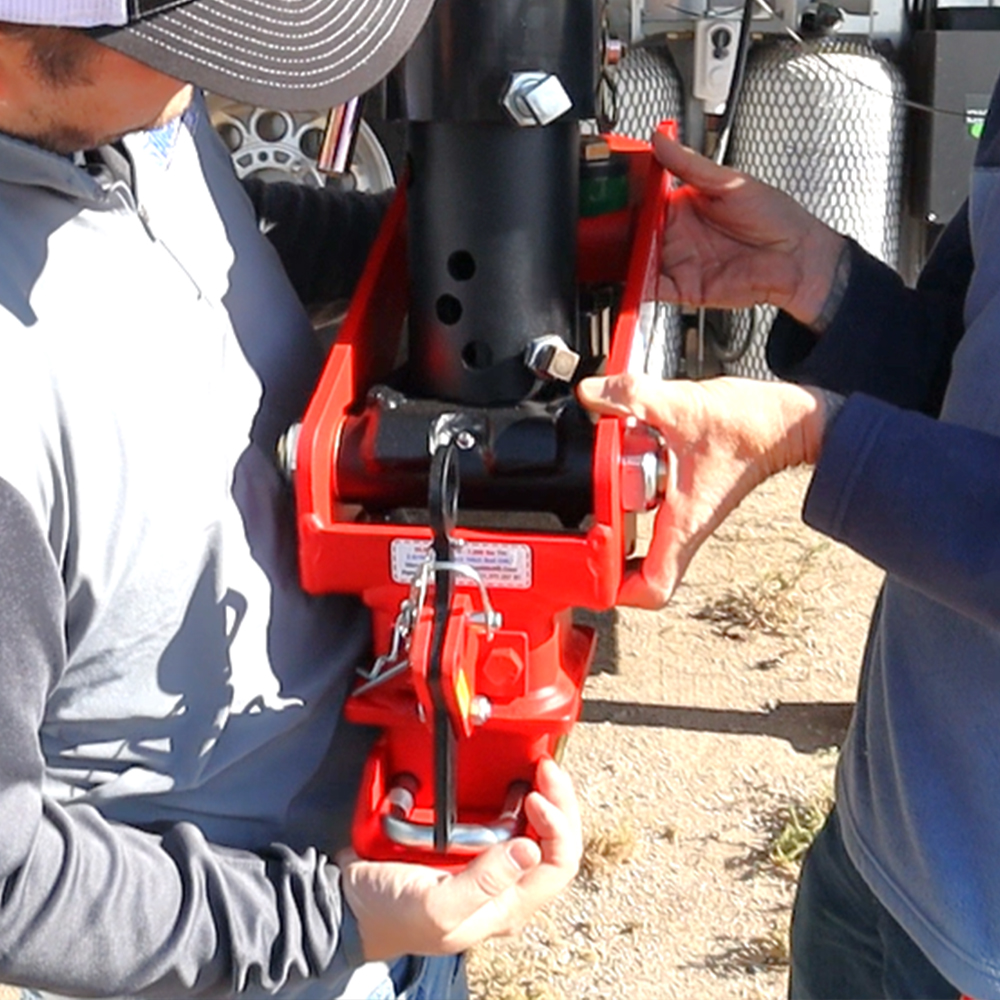
Quick Install: On a level surface, measure coupler tube bottom to trailer frame sleeve bottom, transfer measurement to Shocker Hitch. Remove original coupler (inner) tube; loosen set bolt(s), pull pin, slide out. Insert Shocker Hitch into trailer’s outer tube, reinstall pin, and set bolt(s).
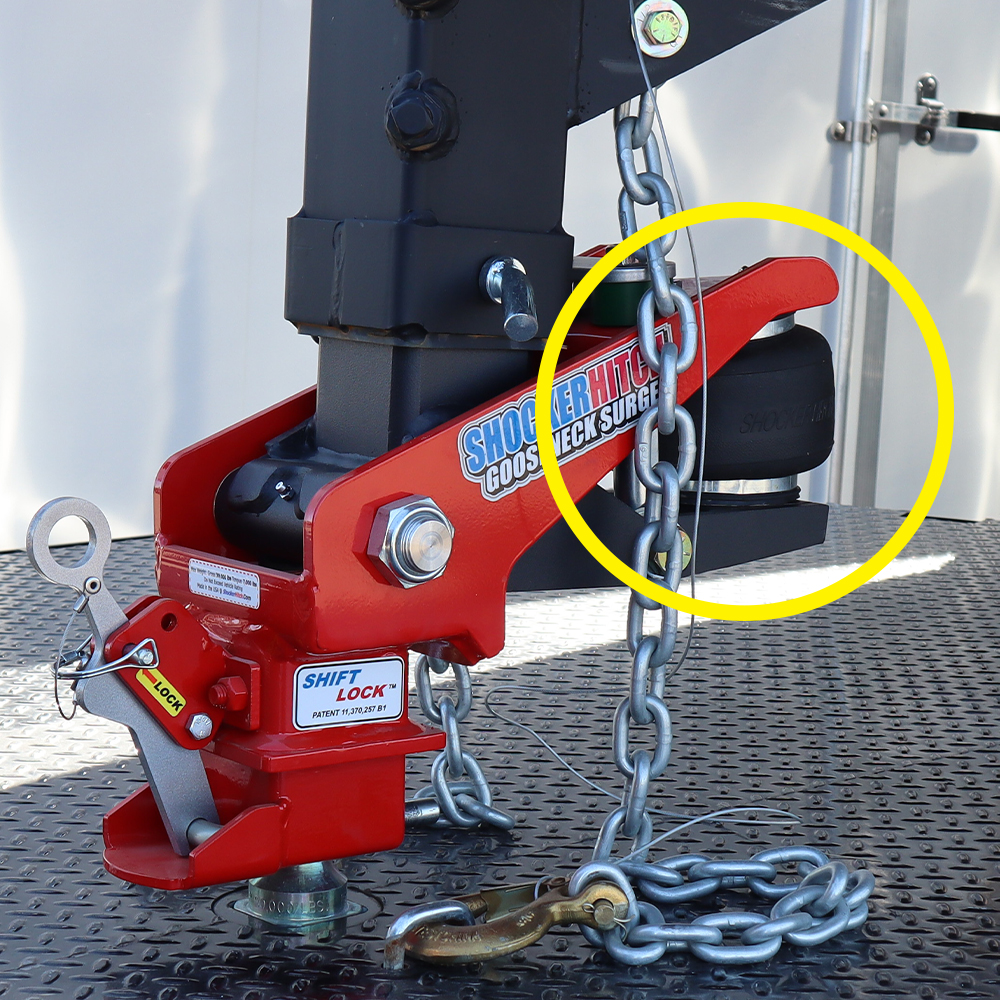
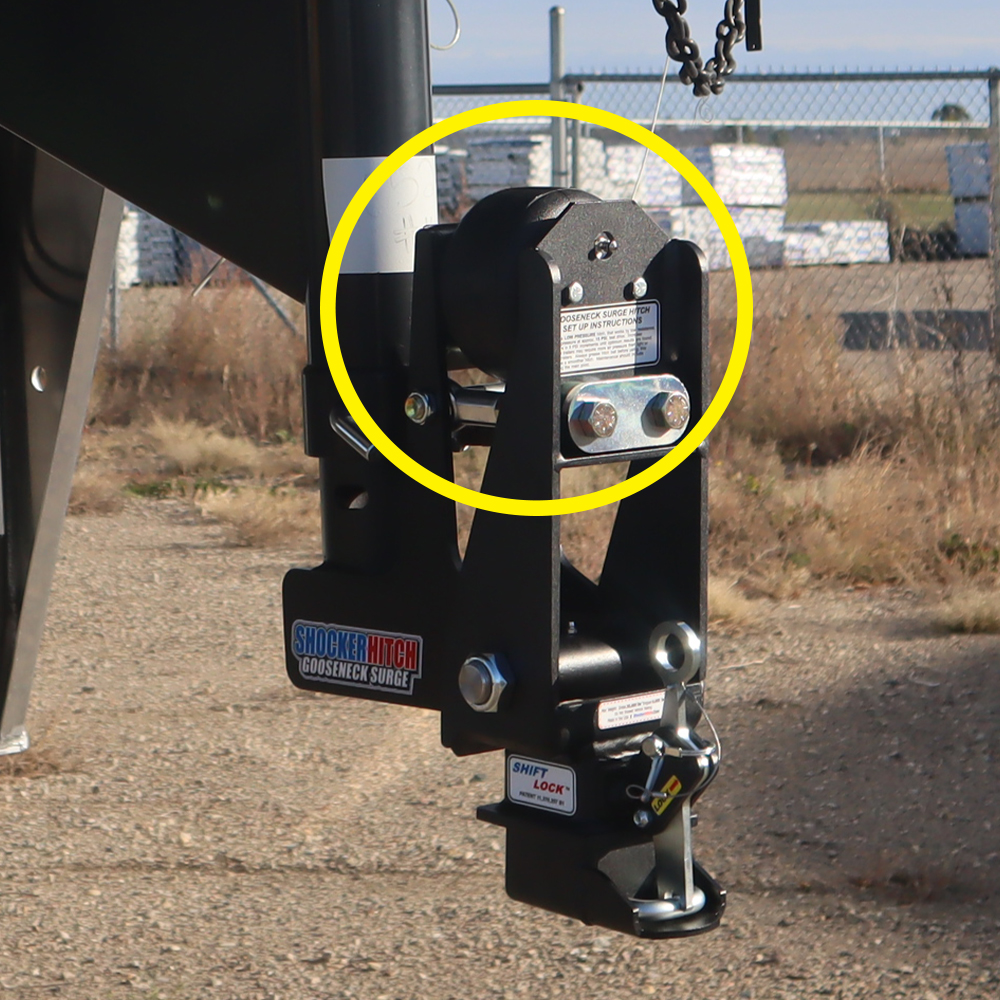
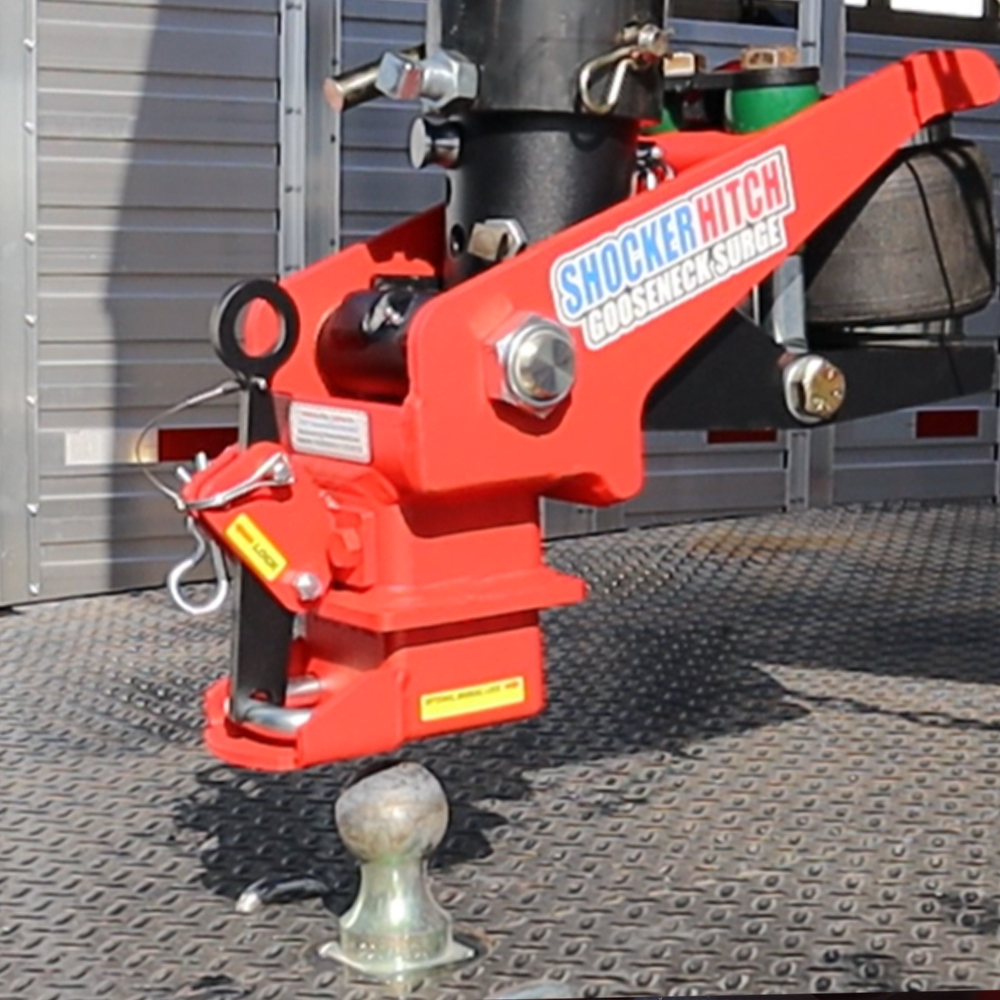
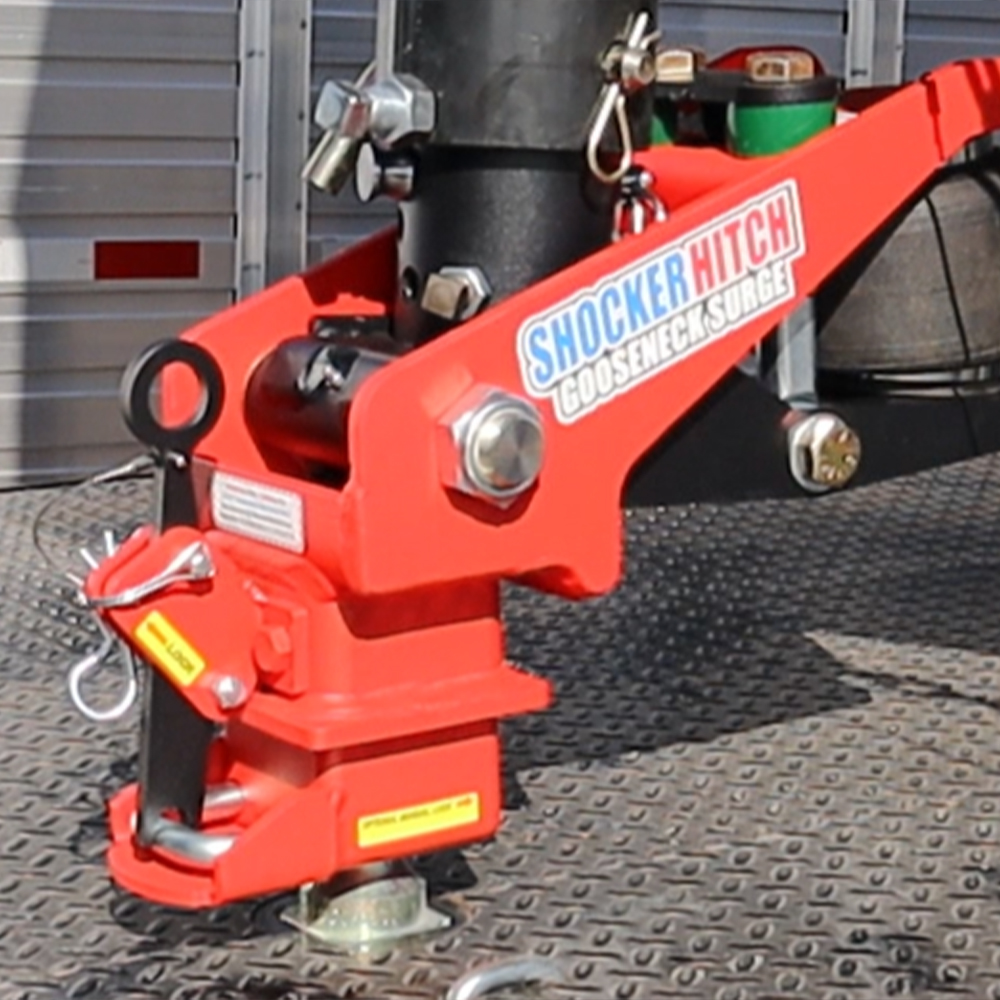
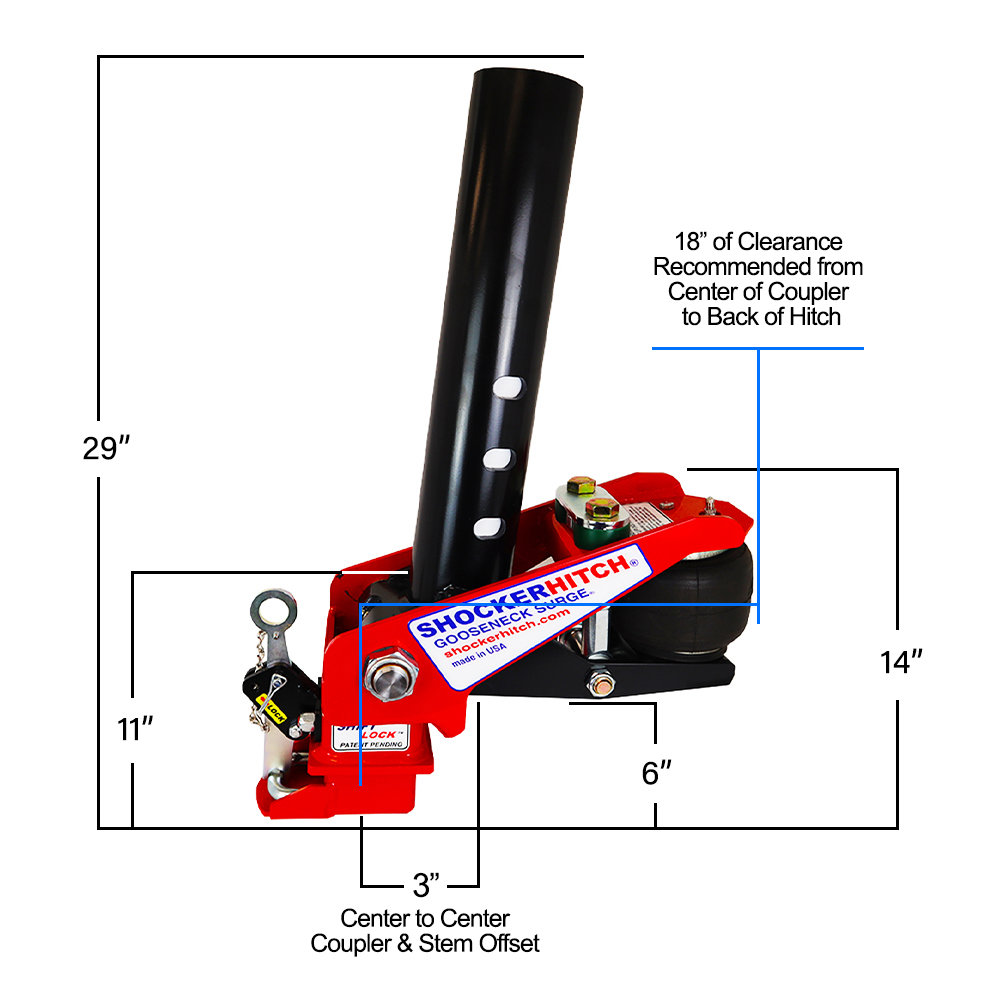
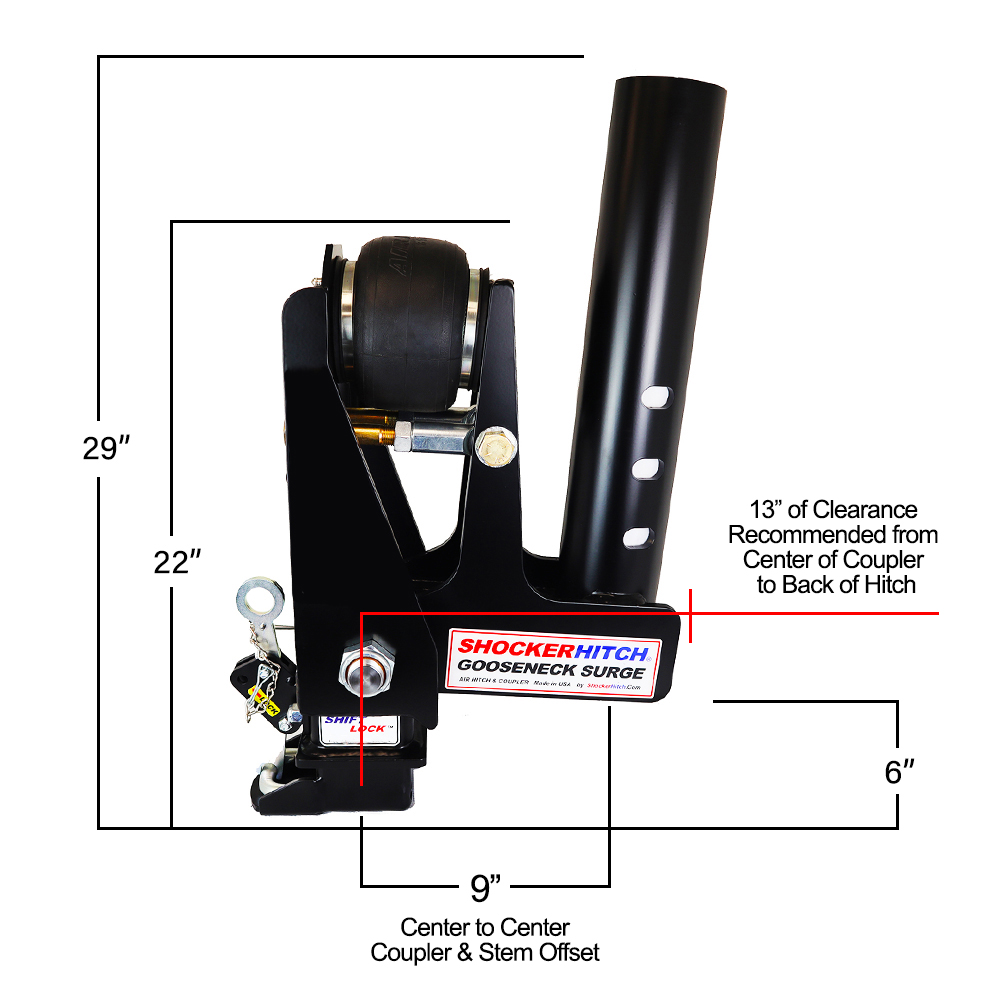
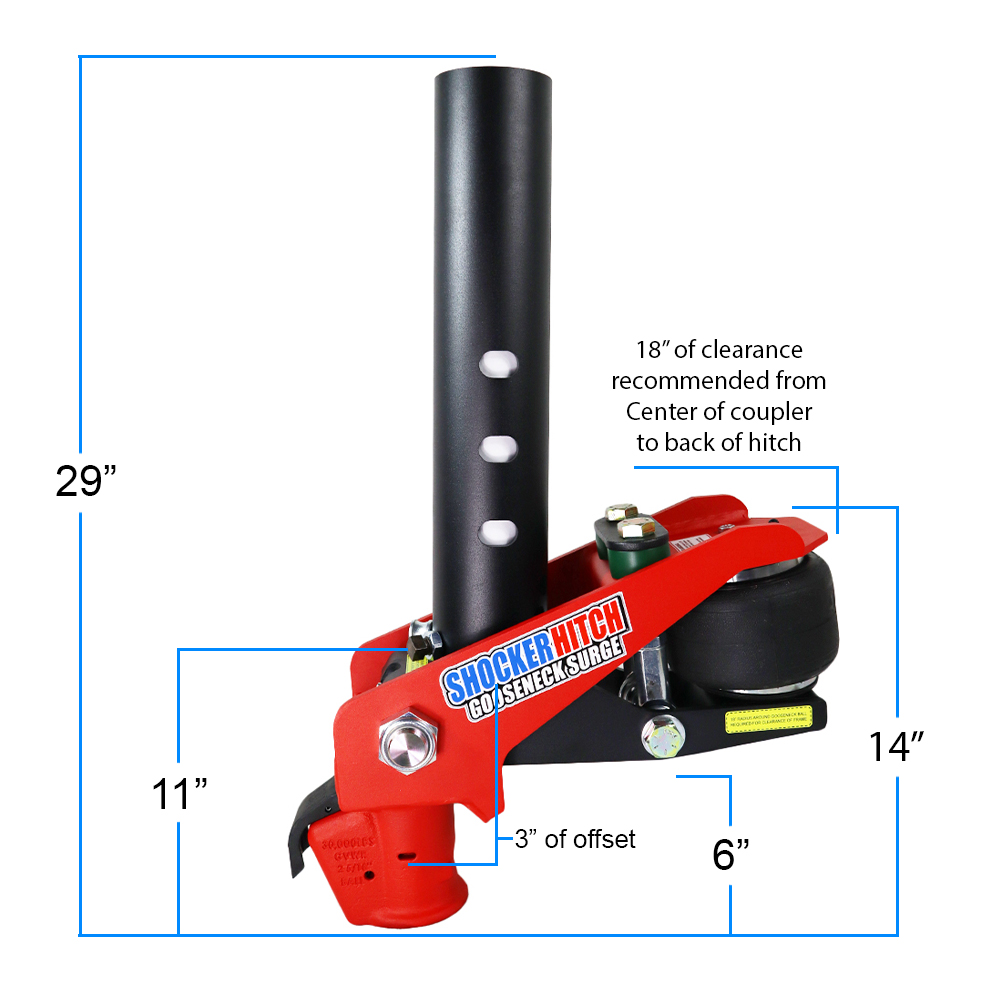
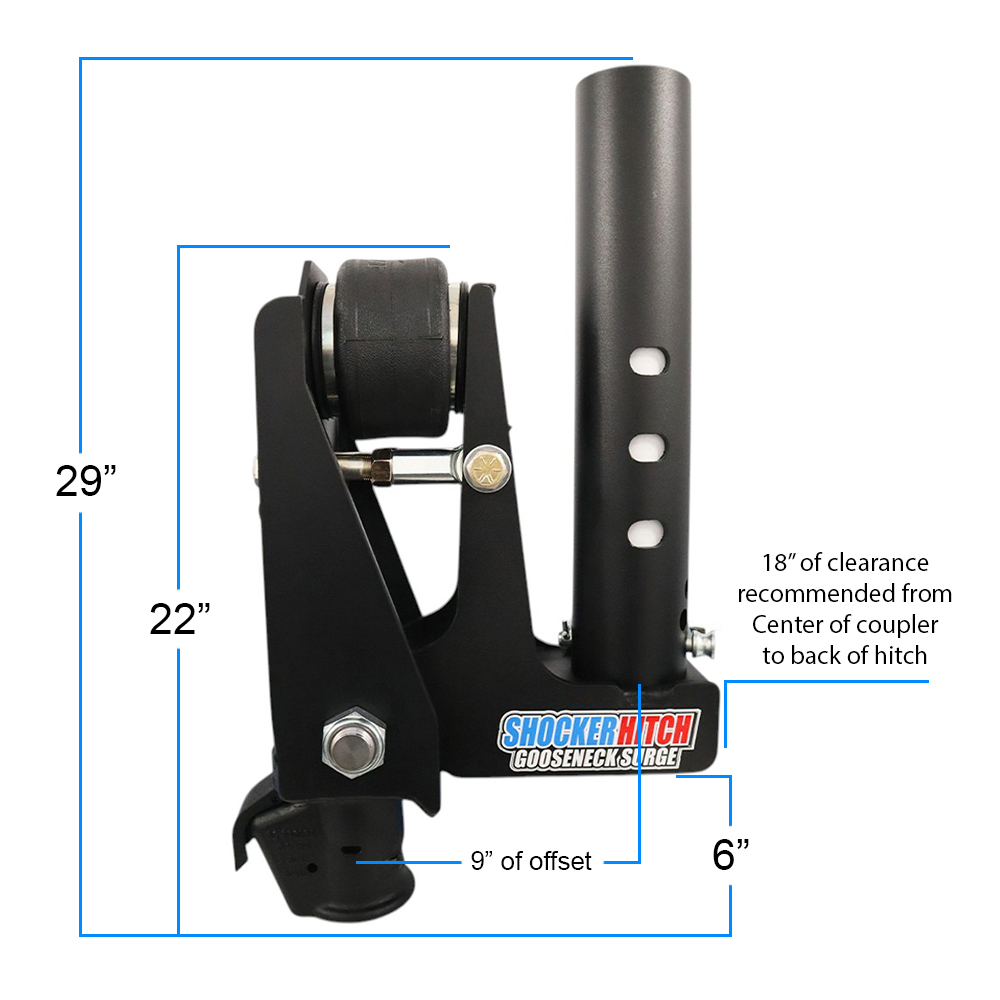
NOTE: Standard red frame: air bag faces trailer rear (Figure 1). 9″ offset black frame: air bag faces vehicle cab/trailer front (Figure 2). Ensure hitch sits straight and parallel with trailer (Figures 3-4). Torque locking set bolt(s) to trailer manufacturer’s recommended specifications or 125 ft. lbs. Before hooking up, lubricate coupler u-bolt and gooseneck ball.
For proper use of Shift Lock coupler, see “How To Use Shift Lock Coupler” section.
Figure 1: Standard red frame models. Air bag faces toward trailer.
Figure 2: Offset black frame models. Air bag faces toward truck cab.
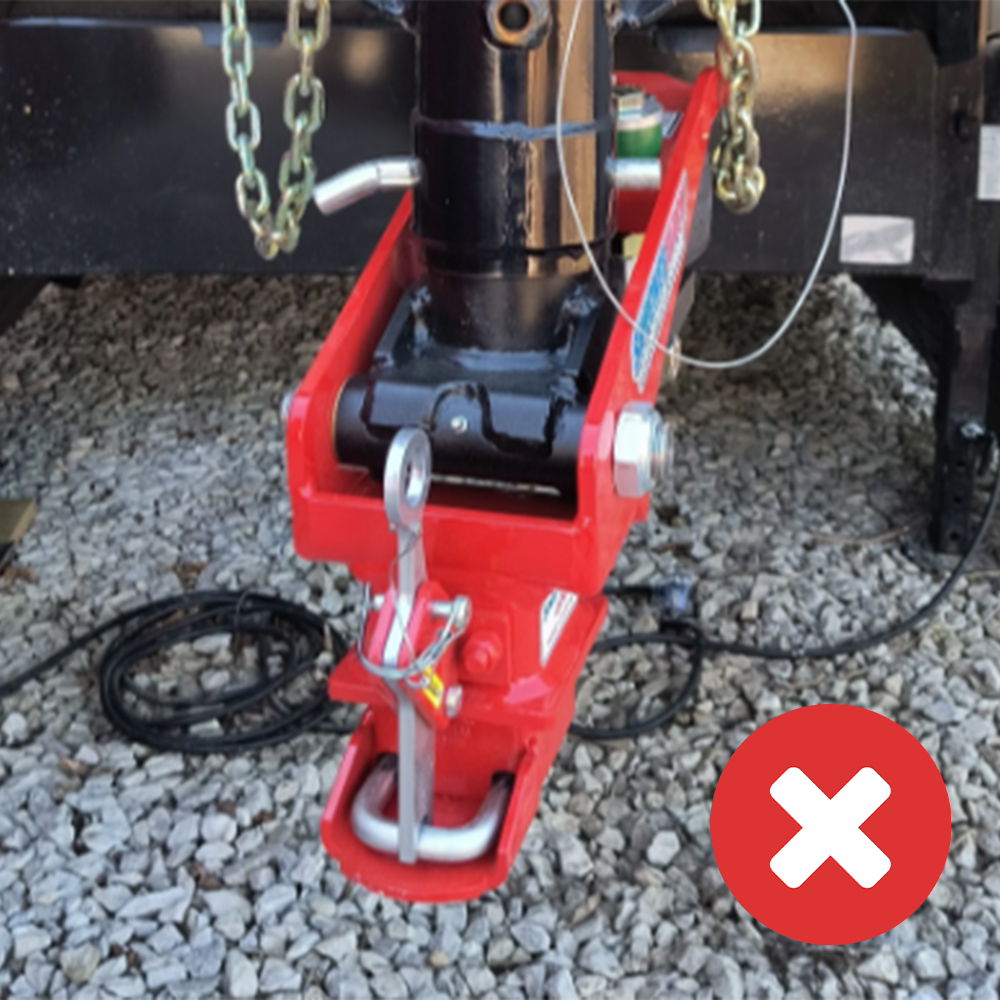
Figure 3: Hitch is crooked, readjust at stem and/or trailer pin.
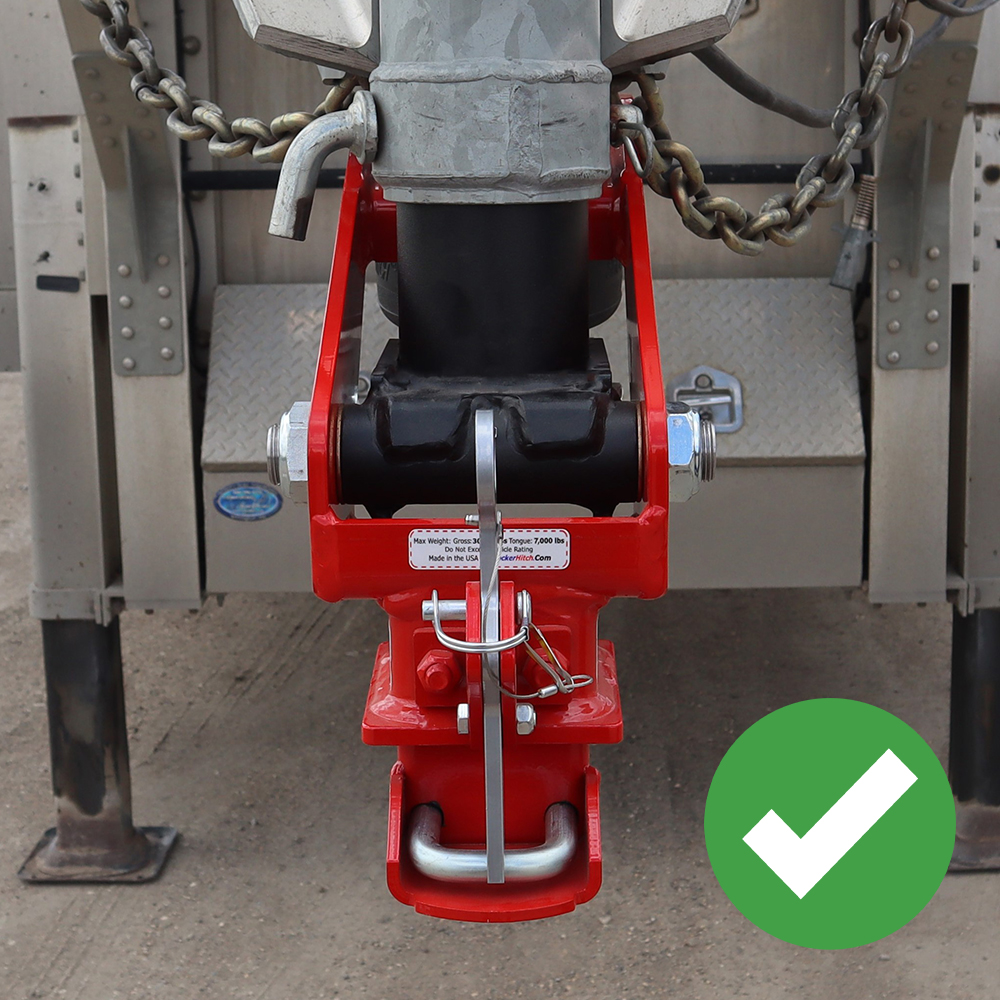
Figure 4: Hitch is straight, no adjustments needed.
Shocker Gooseneck Surge Air Hitch Installation
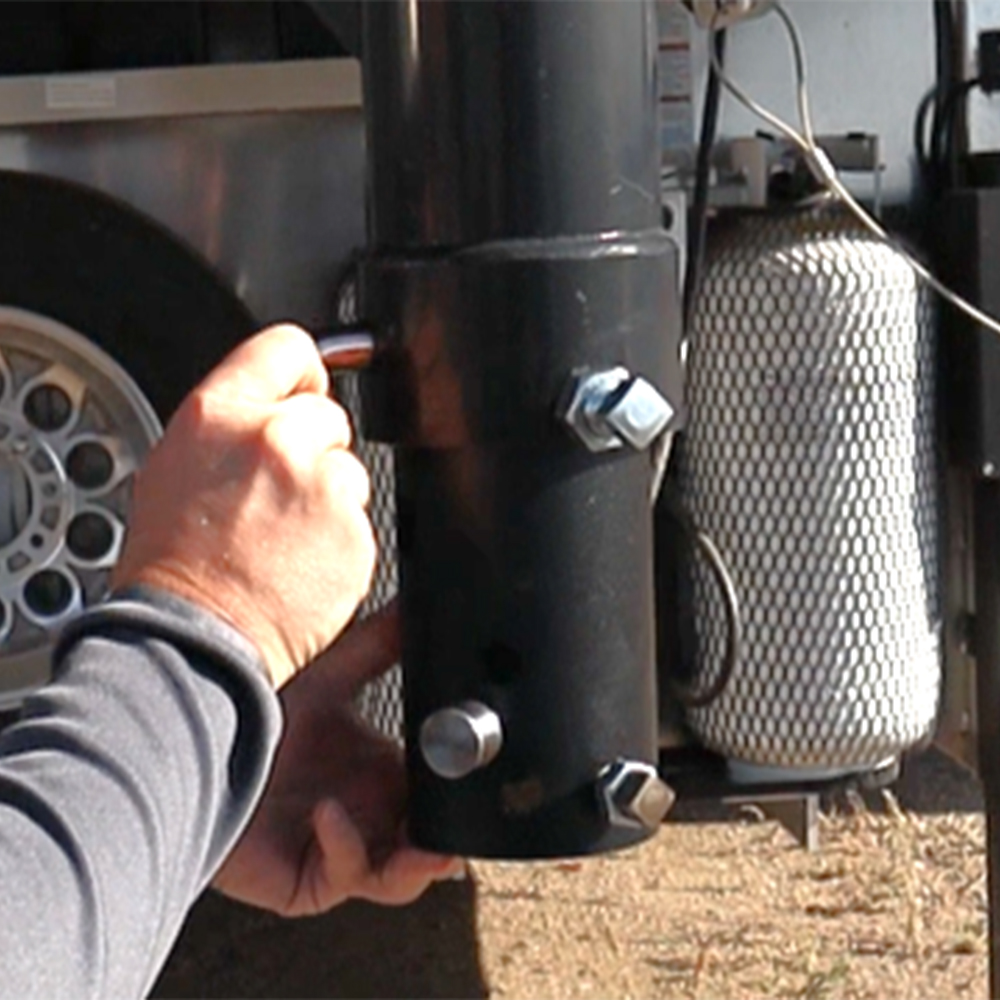
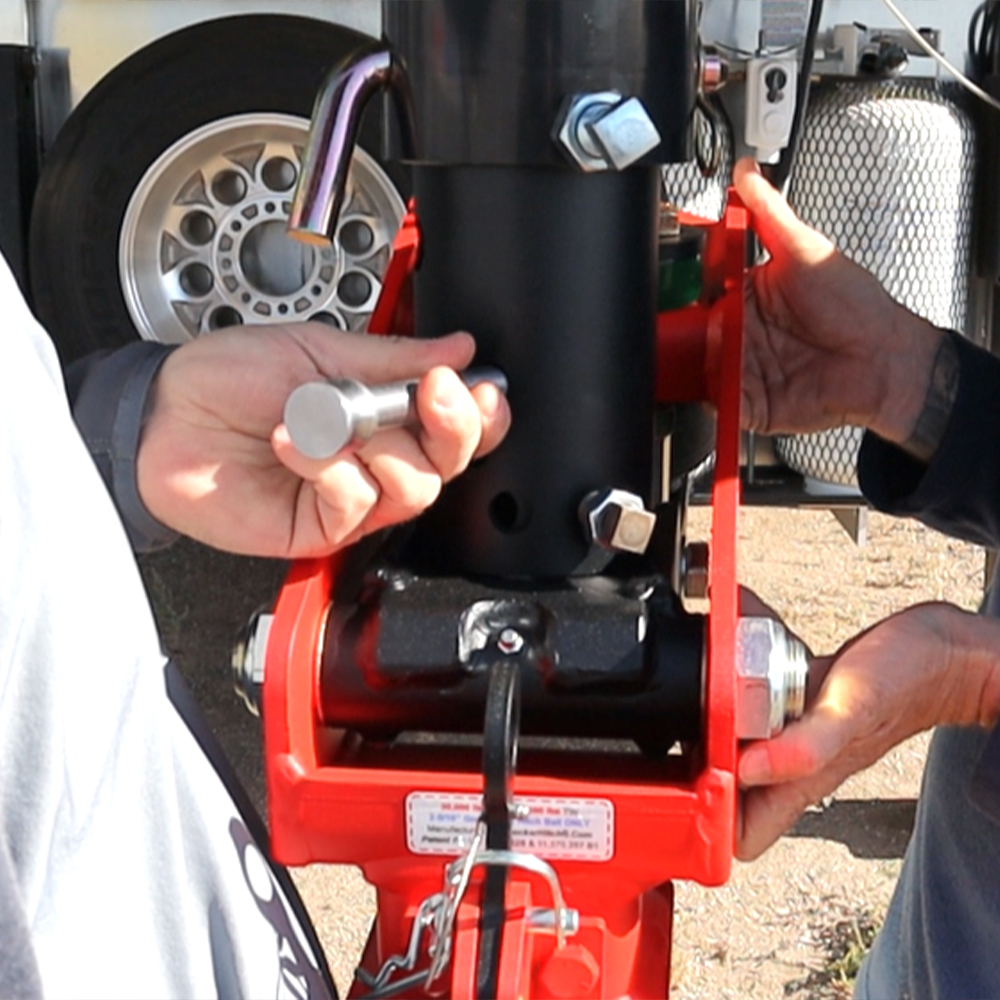
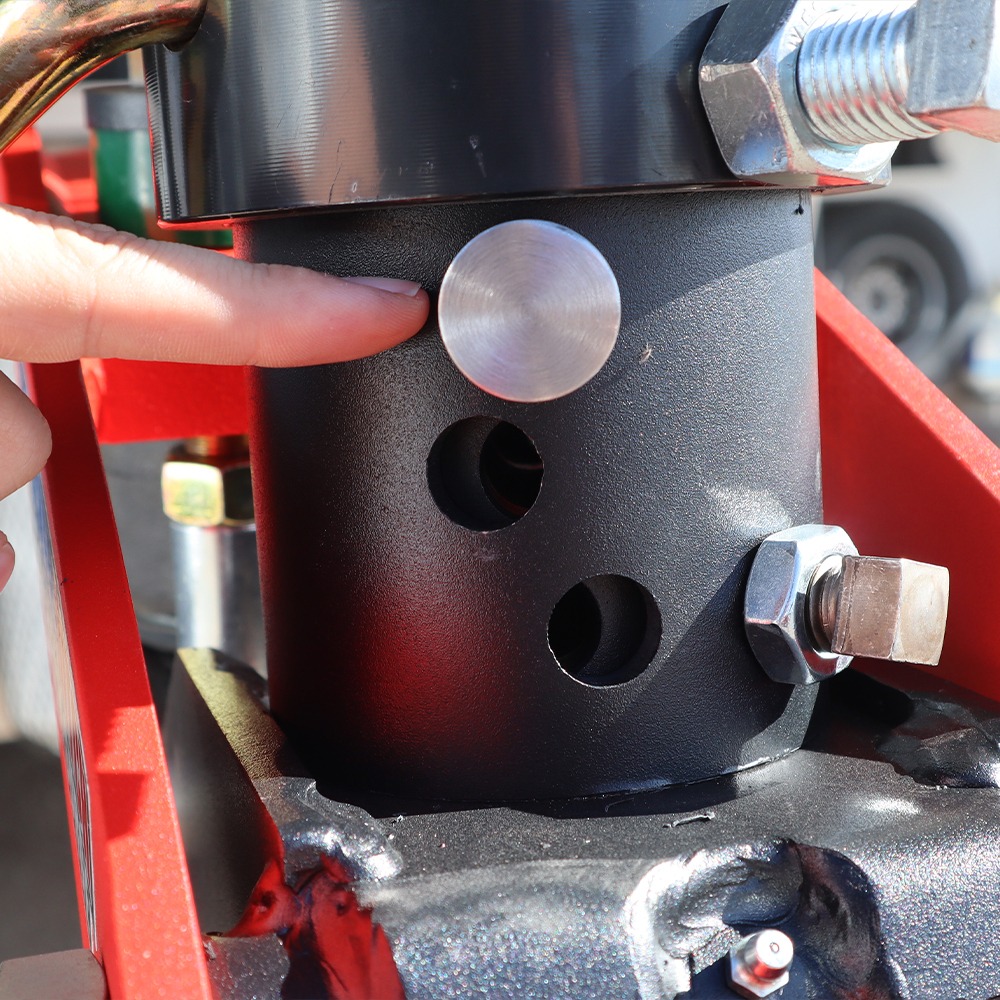
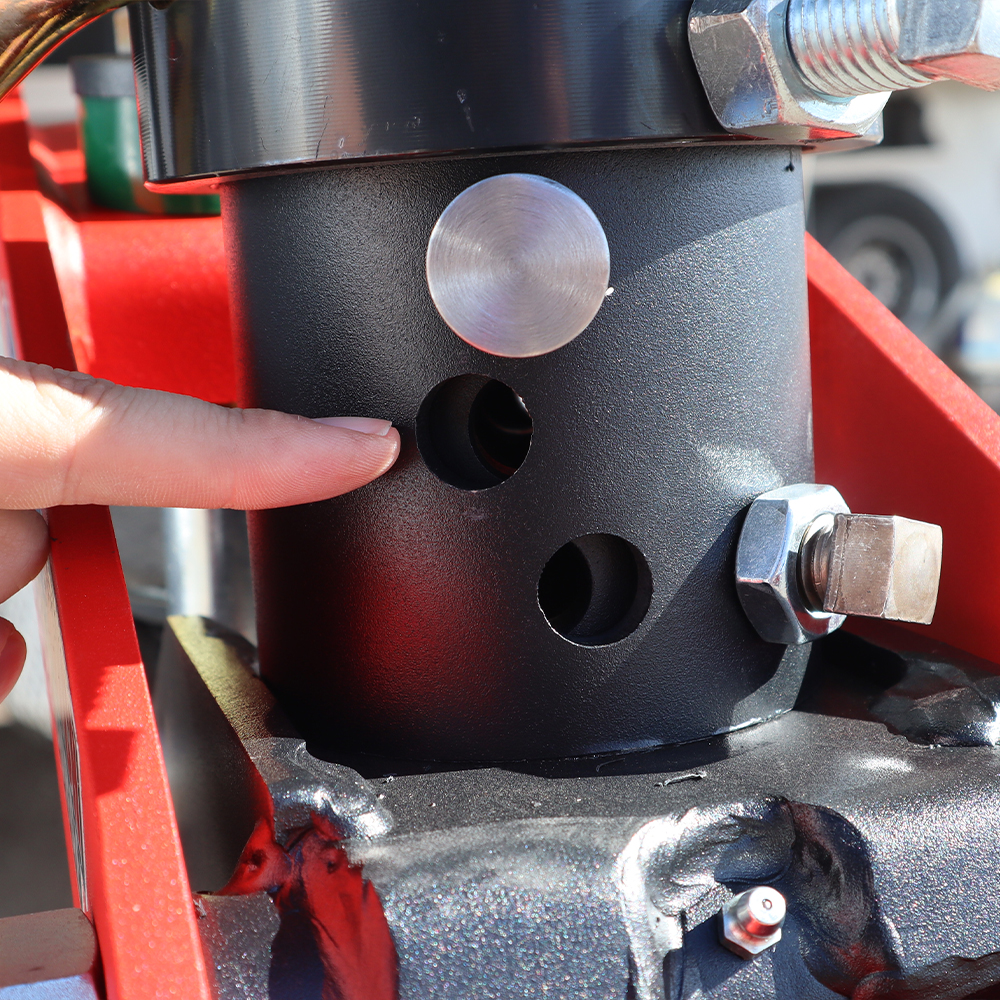
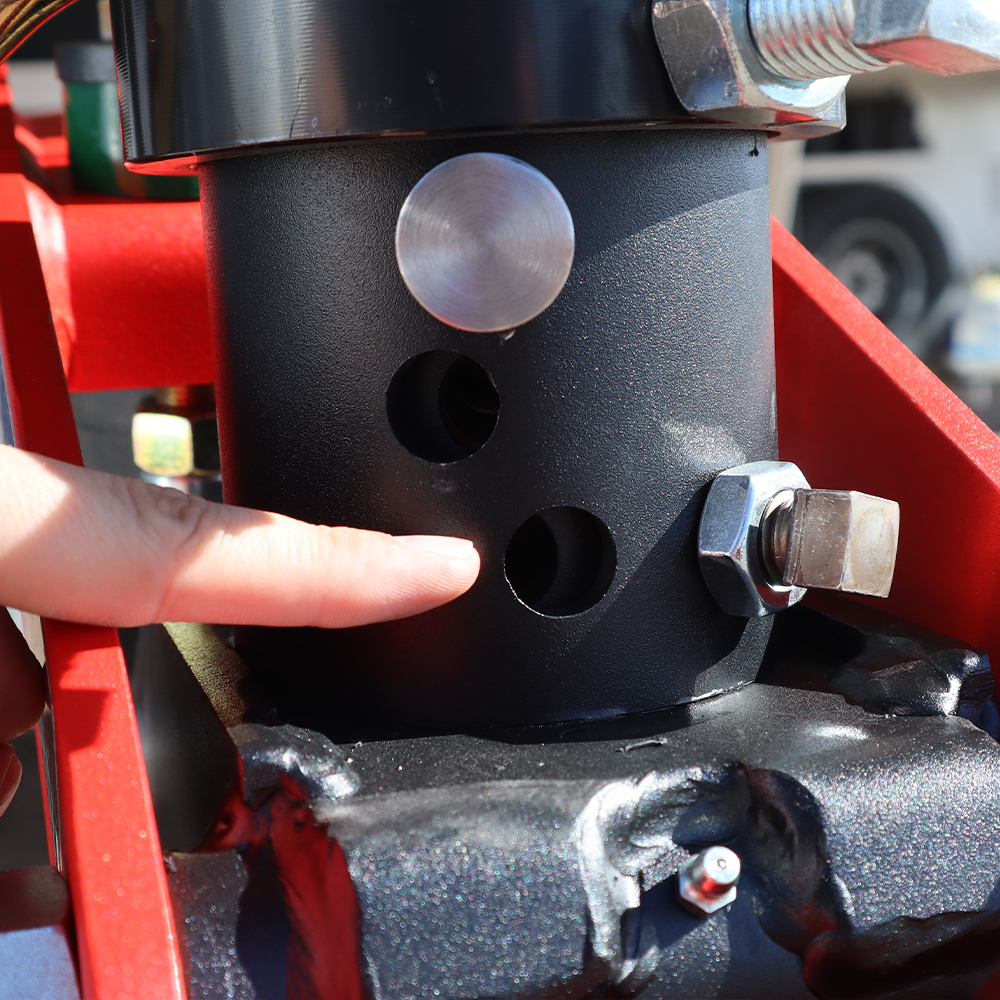
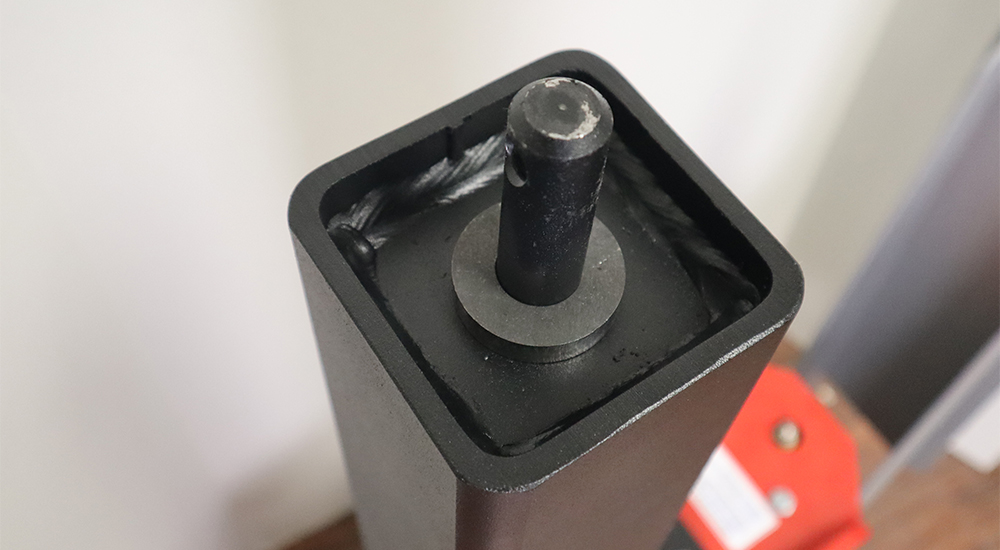
Multi-Fit StemQuick Install: On a level surface, measure coupler tube bottom to trailer frame sleeve bottom, transfer measurement to Shocker Hitch. Remove original coupler (inner) tube; loosen set bolt(s), pull pin, slide out. Slide Multi-Fit round stem into trailer tube to desired hole, secure with 3/4″ pin (Figure 5).
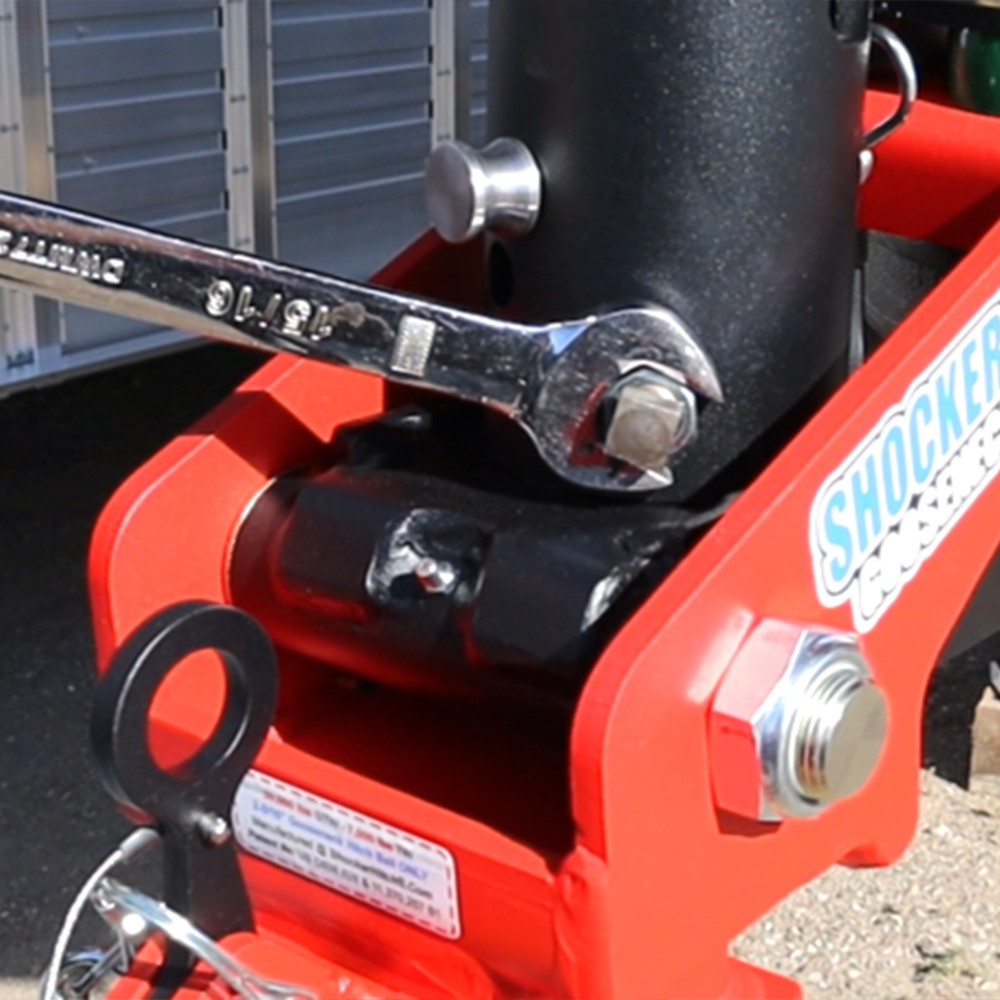
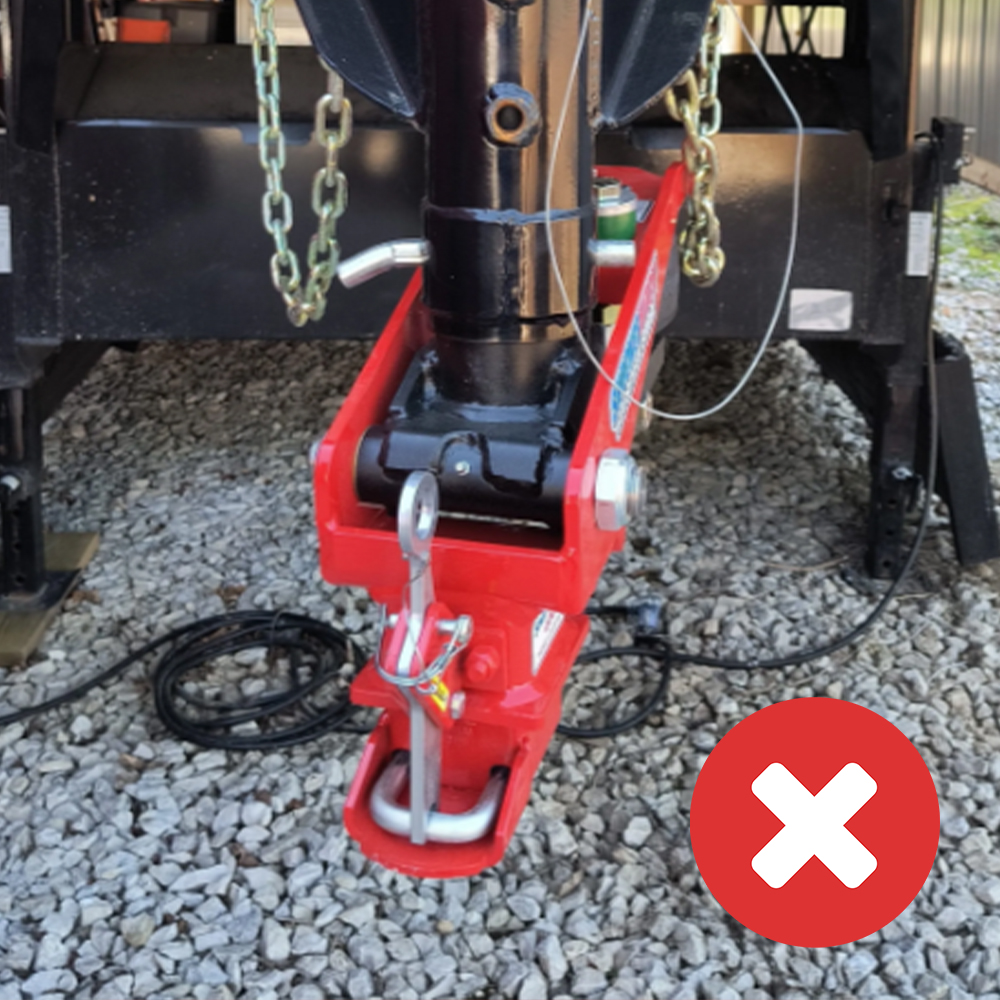
NOTE: Standard red frame: air bag faces trailer rear (Figure 6) and secure with pin (Figure 7). 9″ offset black frame: air bag faces vehicle cab/trailer front. Tighten trailer set bolt(s) and jam nut(s) first, then tighten Multi-Fit stem set bolt and jam nut (Figure 8). DO NOT tow if hitch is crooked (Figures 9-10). Torque locking set bolt(s) to trailer manufacturer’s recommended specifications or 125 ft. lbs. Before hooking up, lubricate coupler u-bolt and gooseneck ball.
Adjust as needed for alignment. See angle guide for different positions (Figure 11-13).
Top hole: 4″ Round Stems with 10°-20° Angled Pin Holes
Middle hole: 100mm Round Stems with 20°-30° Angled Pin Holes
Bottom hole: Round Stems with Straight Pin Holes.
For proper use of Shift Lock coupler, see “How To Use Shift Lock Coupler” section.
Shocker Multi-Fit Round Stem Gooseneck Surge Air Hitch Installation
Figure 5: Slide Multi-Fit stem into trailer tube to desired pin hole and secure with 3/4″ pin.
Figure 6: Slide red frame section into Multi-Fit system with air bag toward trailer.
Figure 7: Rotate red frame sections until straight with trailer frame and secure with provided pin.
Figure 8: Tighten smaller set-bolt snug. Tighten jam nut.
Figure 9: Hitch is crooked, readjust at stem and-or trailer pin.
Figure 10: Hitch is straight, no adjustments needed.
Figure 11: Top hole: 4″ Round Stems with 10°-20° Angled Pin Holes.
Figure 13: Bottom hole: Round stems with straight pin holes.
Shocker Top Crank Handle Stem Gooseneck Surge Air Hitch Installation
Top Crank HandleQuick Install: Remove 3/8″ bolt and handle assembly. Loosen set bolts and remove existing coupler stem. Transfer bearing and 3/8″ washer to Shocker Hitch stem. Grease stem threads generously, slide into trailer until engaged, tighten set screws, add 3/8″ washer to exposed crank stem. Reinstall crank handle with 3/8″ bolt before vehicle hook-up. Hook up trailer and adjust coupler to level trailer.
Note: Bulldog brand couplers require an additional 3/8″ washer (supplied with Shocker Hitch). Torque locking set bolt(s) to trailer manufacturer’s recommended specifications or 125 ft. lbs. Before hooking up, lubricate coupler u-bolt and gooseneck ball.
For proper use of Shift Lock coupler, see “How To Use Shift Lock Coupler” section.
Provided 3/8″ washer for top crank goosenecks.
How To Use Shift Lock Coupler
Start at 15 PSI. Test drive and adjust in 5 PSI increments until optimal. High winds may require added PSI. NEVER exceed 100 PSI in air bag, this will damage air bag. Grease hitch ball and pivot bolt regularly using the grease zerk on base of stem. Recommended to grease every 6-12 months based on usage to reduce wear.
To connect: Move handle to unlocked position (Figure 15), lower trailer ontoo ball (Figure 16), move handle to locked position, insert quick clip pin. Check Lock: u-bolt should stick out 1″ from coupler rear when locked (Figure 17). If you do NOT see this, repeat stems 1 and 2 until u-bolt is visible from rear of coupler.
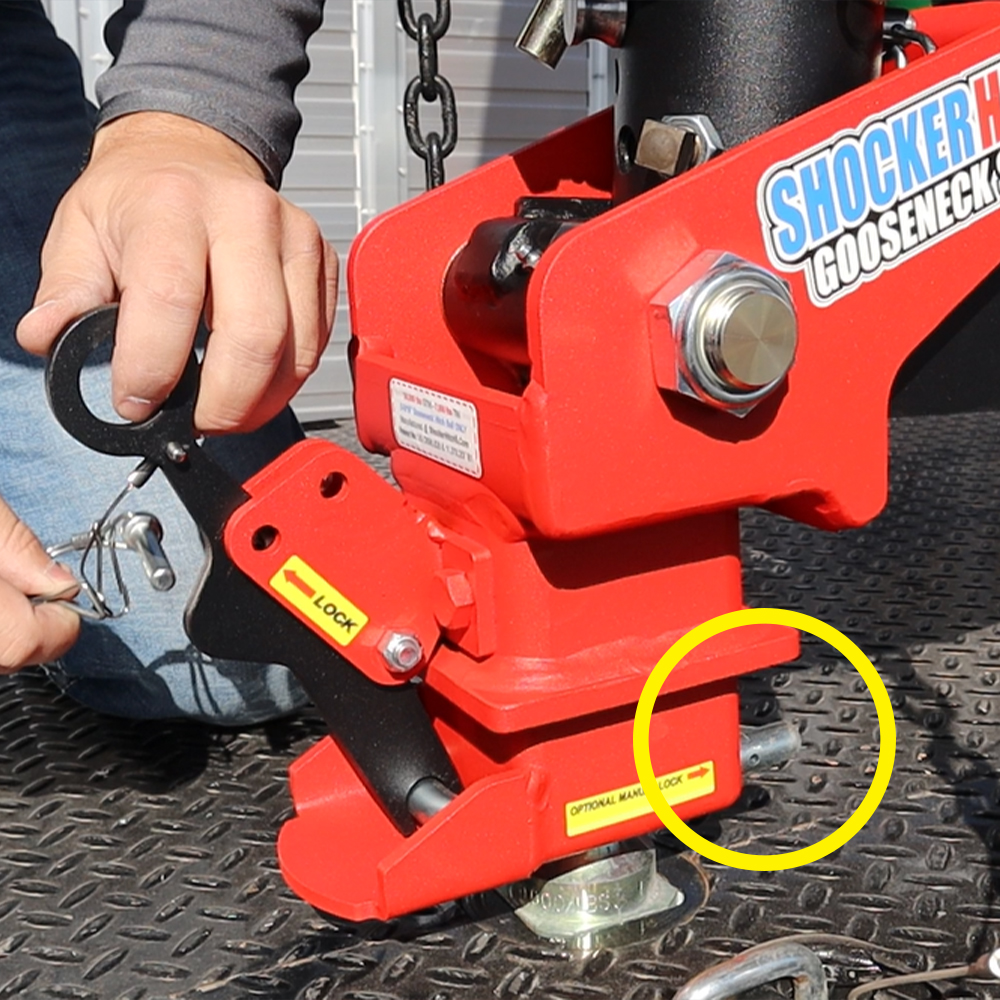
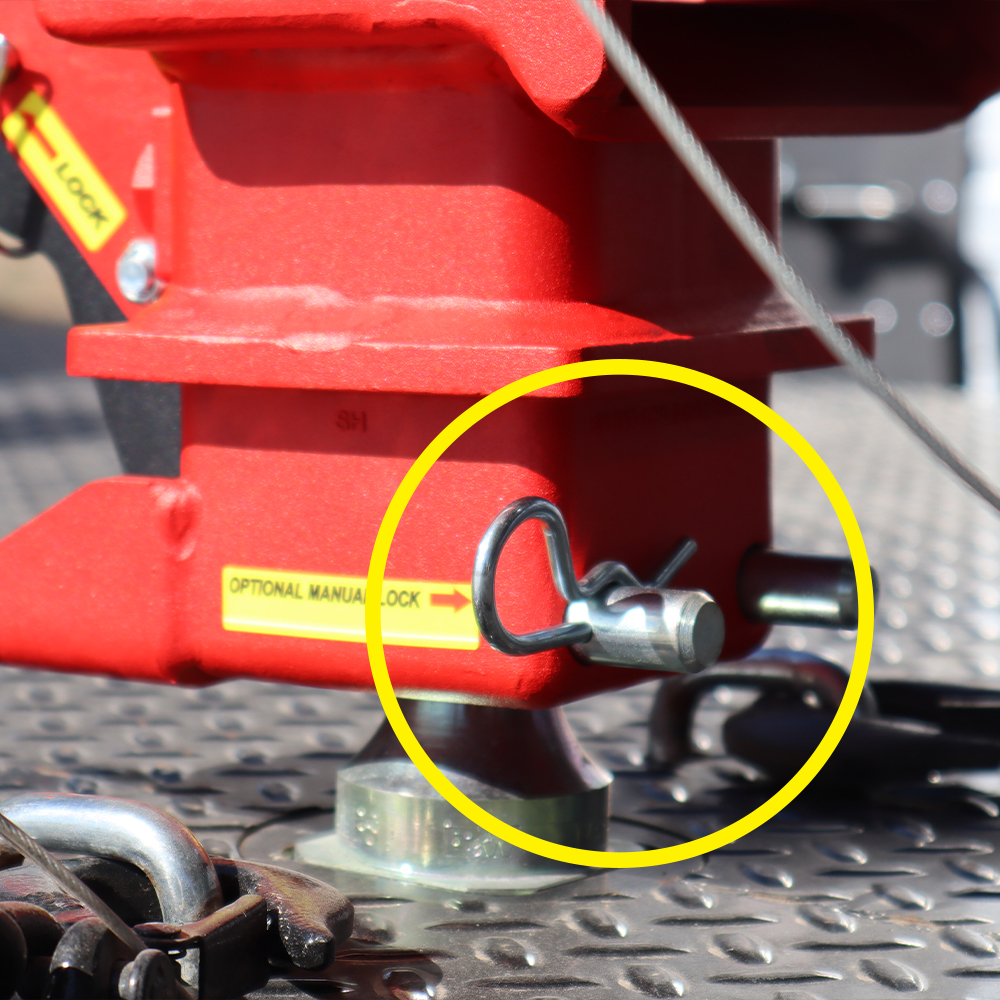
Manual lock option available for additional security or if Shift Lock handle is damaged (Figure 18).
Figure 17: Shift Lock coupler in correct locked position 1″ of the u-bolt stick out.
Figure 18: Optional manual lock pin on back of u-bolt (driver’s side).
Setting Air Pressure & Maintenance
Start at 15 PSI. Test drive and adjust in 5 PSI increments until optimal. High winds may require added PSI. NEVER exceed 100 PSI in air bag, this will damage air bag. Grease hitch ball and pivot bolt regularly using the grease zerk on base of stem. Recommended to grease every 6-12 months based on usage to reduce wear.
Additional Information – Clearance & Diagrams
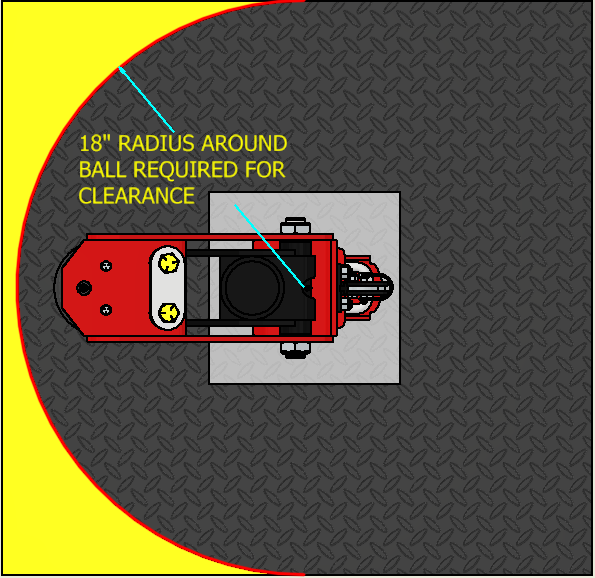
Hitch must rotate at an 18″ radius around the ball to prevent contact with items in bed (red frame).
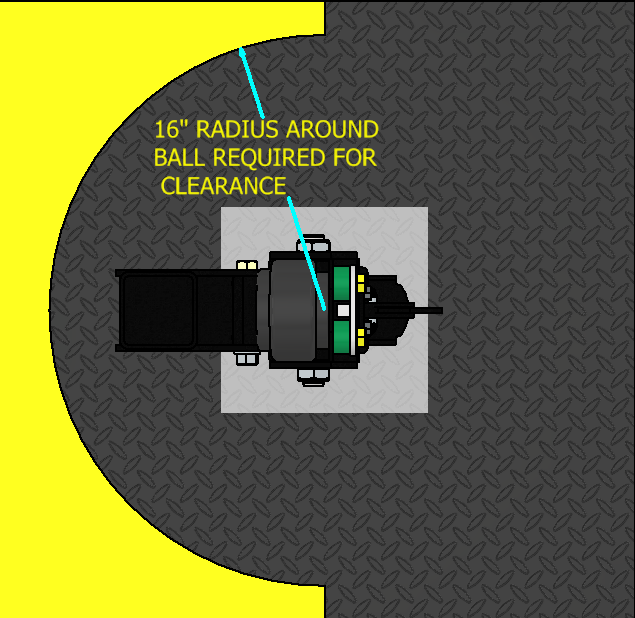
Hitch must rotate at an 16″ radius around the ball to prevent contact with items in bed (black offset frame).
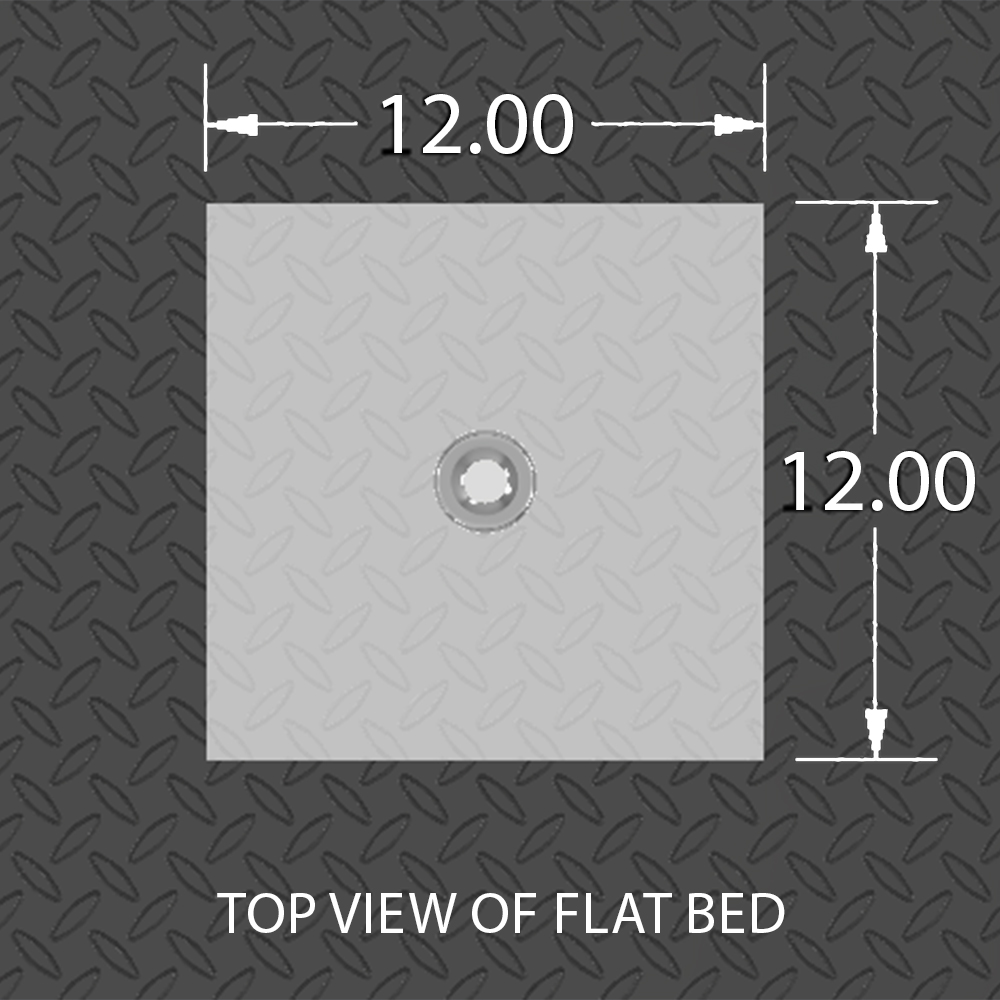
Top View: Recommended that the Shift Lock coupler have a minimum clearance of 12″x12″ for flat beds.
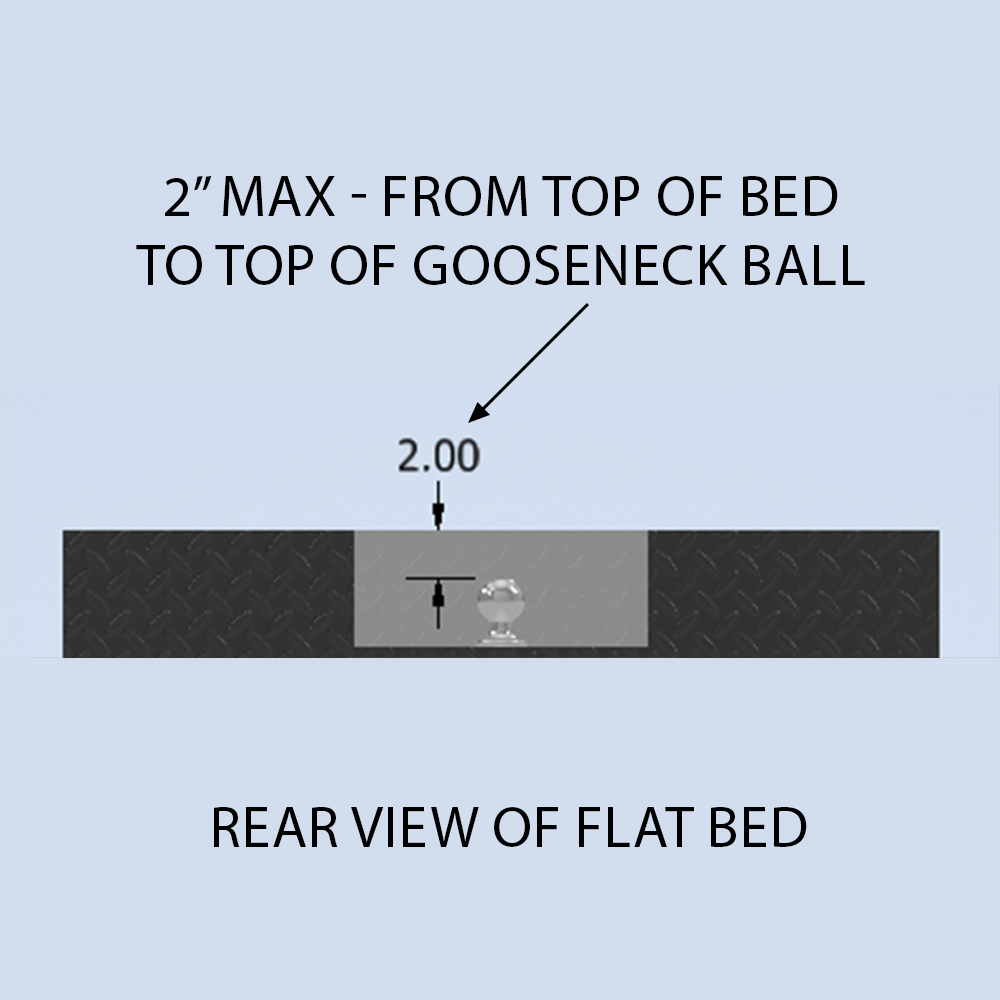
Rear View: Recommended that the distance from the top of the bed to the top of the ball be a maximum of 2″ for flat beds.
Shocker Gooseneck Surge Air Hitch & Coupler Dimensions Diagram Guide
Shocker Gooseneck Surge Air Hitch with 9-Inch Offset Extension Coupler Diagram
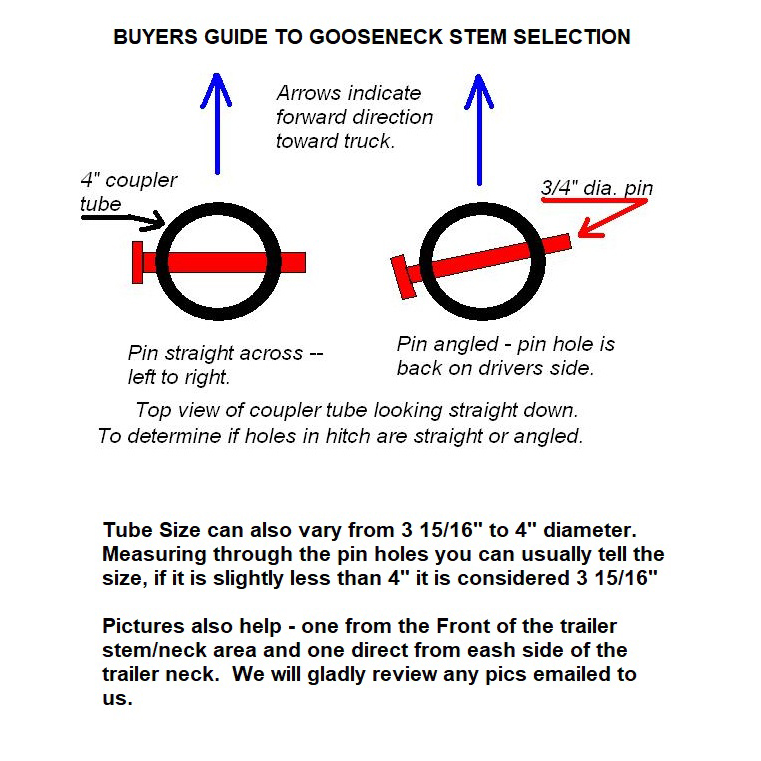
Round Gooseneck Stem Angle & Sizing Guide (Pin Hole Can Be Straight or Angled – Round Stem Can Be 100MM (3-15/16″) or 4″)
Installation Issues? Contact us!
We want you to have the best possible towing experience with your product and proper installation is important. If you need help, we are here for you. Just give us a call at 701-707-2666 or use our contact us form. You can also look up the items product page on our website and view the installation tab. Most products on our website have a set-up guide and installation video.


Reviews