



Shocker Hitch air-pressure setting guide
How much air pressure does your Shocker Hitch need?
The right air pressure depends on your hitch model and trailer load. Receiver and tongue-mount models use a bump-cushion setting; gooseneck and fifth-wheel models use load-dependent PSI settings. Choose your model for the air valve location, setup video and installation guide.
Use your exact model’s installation instructions and pressure limits. The ranges below are examples or typical settings, not universal targets.
Choose your hitch
Jump straight to your model. Each section shows how to set the pressure and where to add air.
14K & 20K HD
Air receiver hitch air pressure
Set the air pressure
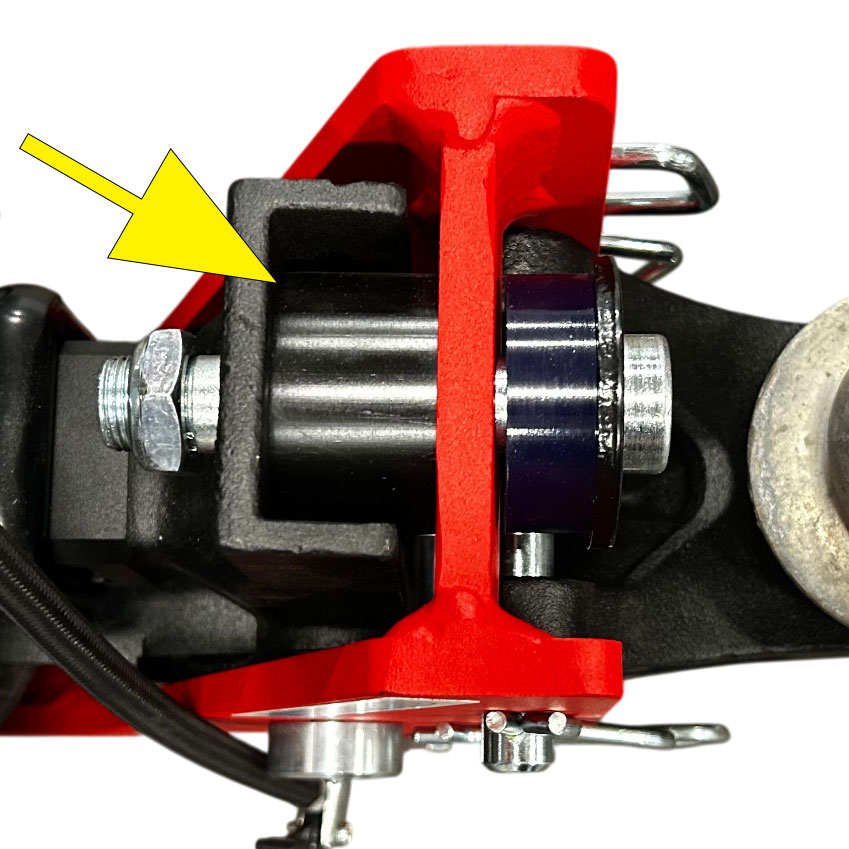
Attach your trailer to your hitch. Add air until the top of the hitch frame touches the truck/tailgate-side bump cushion and compresses it up to 1/8 inch.
The air valve is on the left side of the hitch. Add or remove air when towing a heavier or lighter trailer.
Air receiver hitch installation guide →
Back to model selector ↑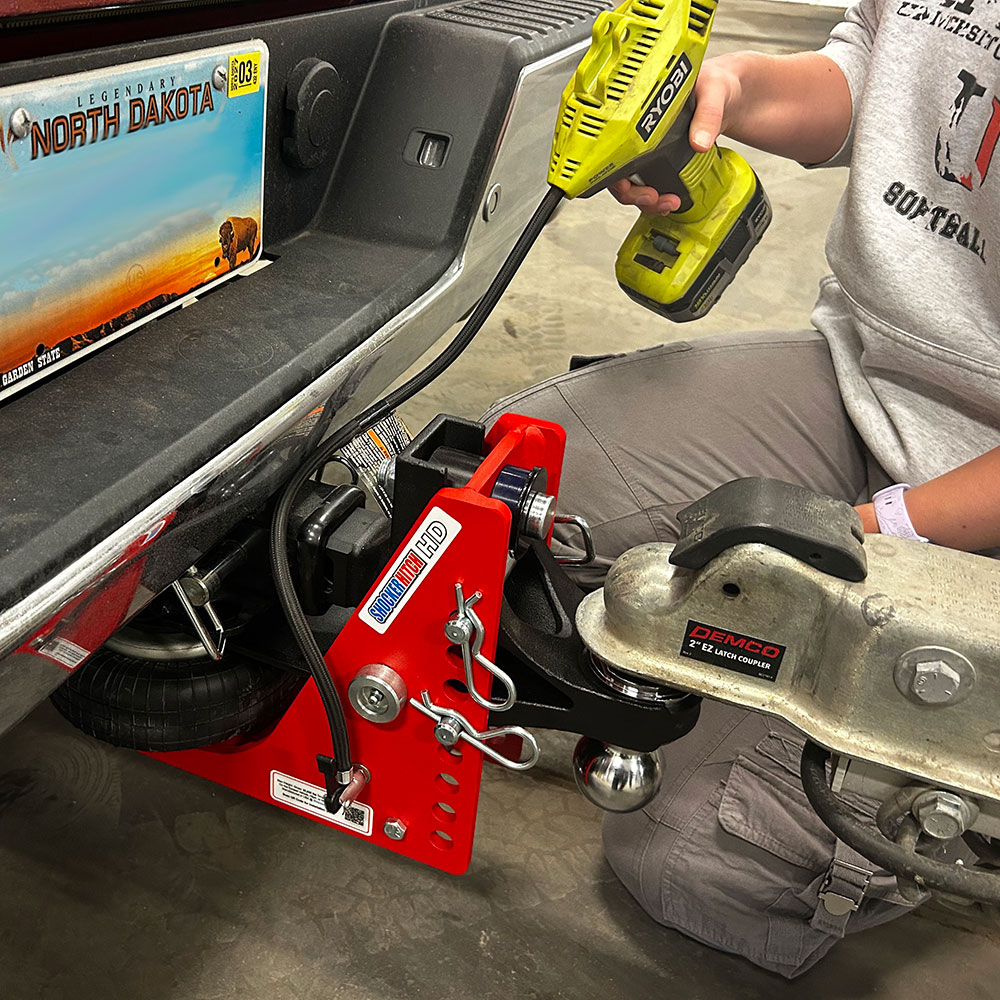
Surge® Air Hitch
Gooseneck Surge® Air Hitch air pressure
Set the air pressure
Pressure varies with the trailer and load. Examples include about 15 PSI for a light horse trailer, around 20 PSI with a skid steer, and 25–35 PSI for an industrial hauler with 25,000 lb.
Fine-tune in 5 PSI steps for ride and load control. These are examples, not a single setting for every trailer.
Gooseneck Surge® Air Hitch installation guide →
Back to model selector ↑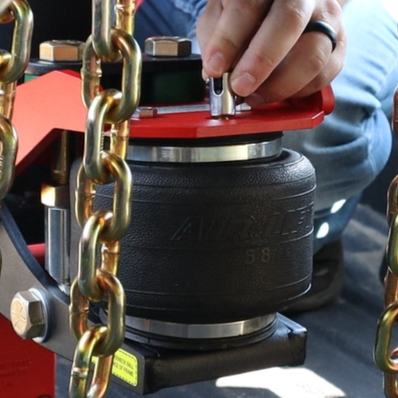
Coupler & pintle ring
Trailer tongue air mount air pressure
Set the air pressure
For SH-HD4000 and SH-4000 vertical-channel mounts and SH-HD4500 and SH-4500 four-bolt square-plate mounts covered by the September 3, 2026 REV-A installation guide.
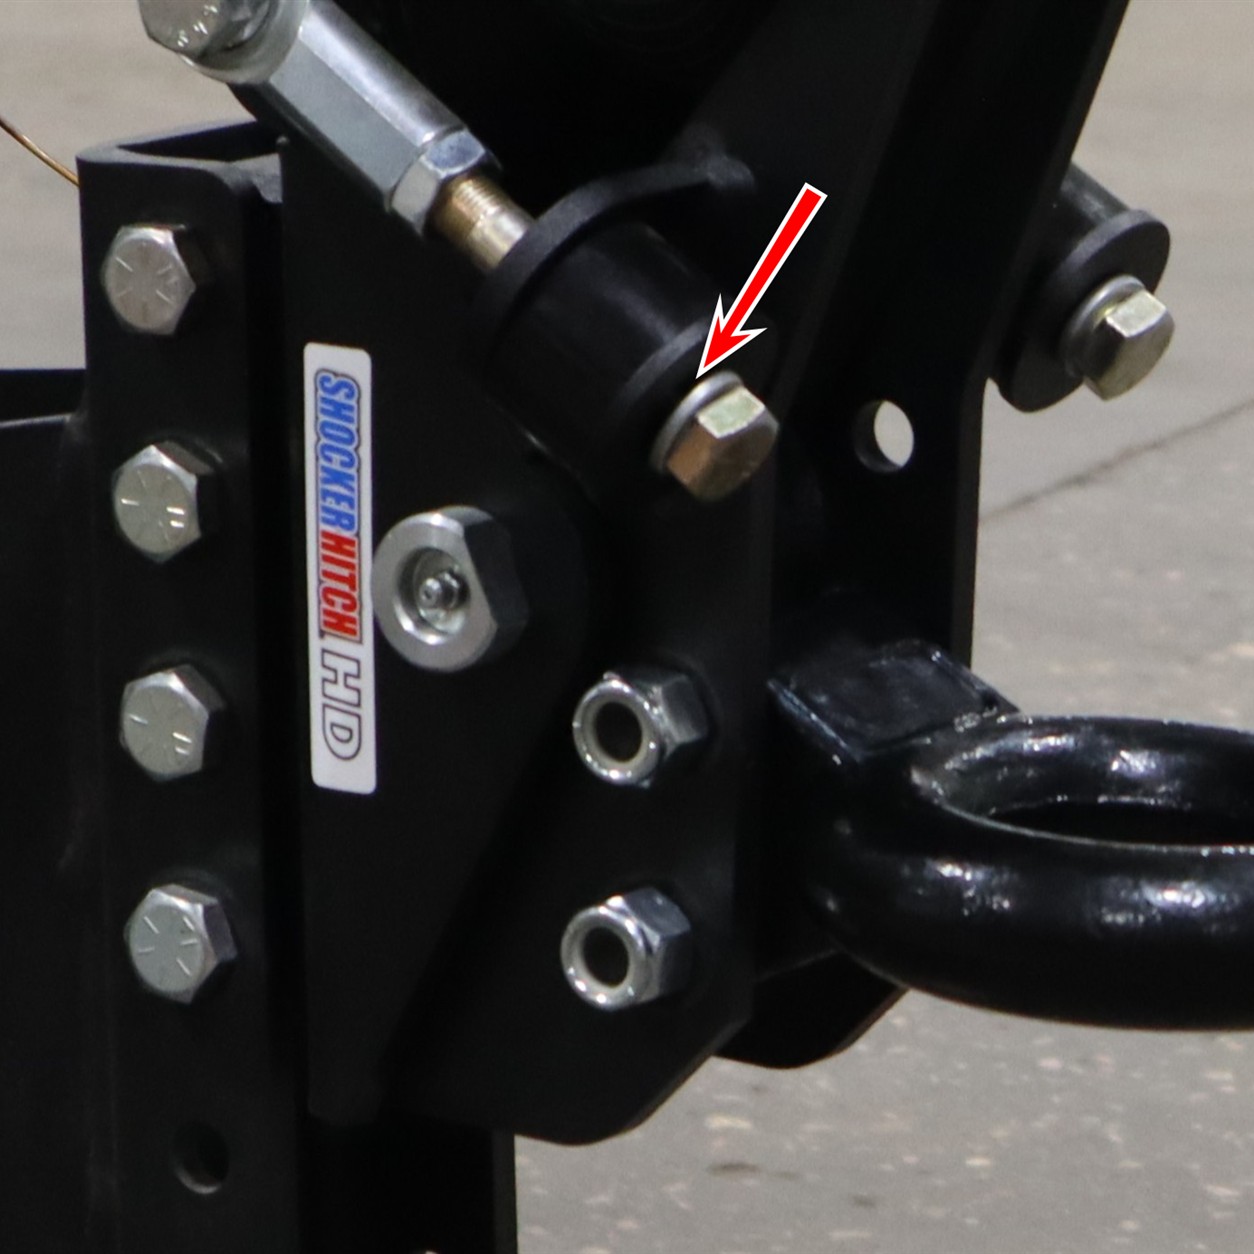
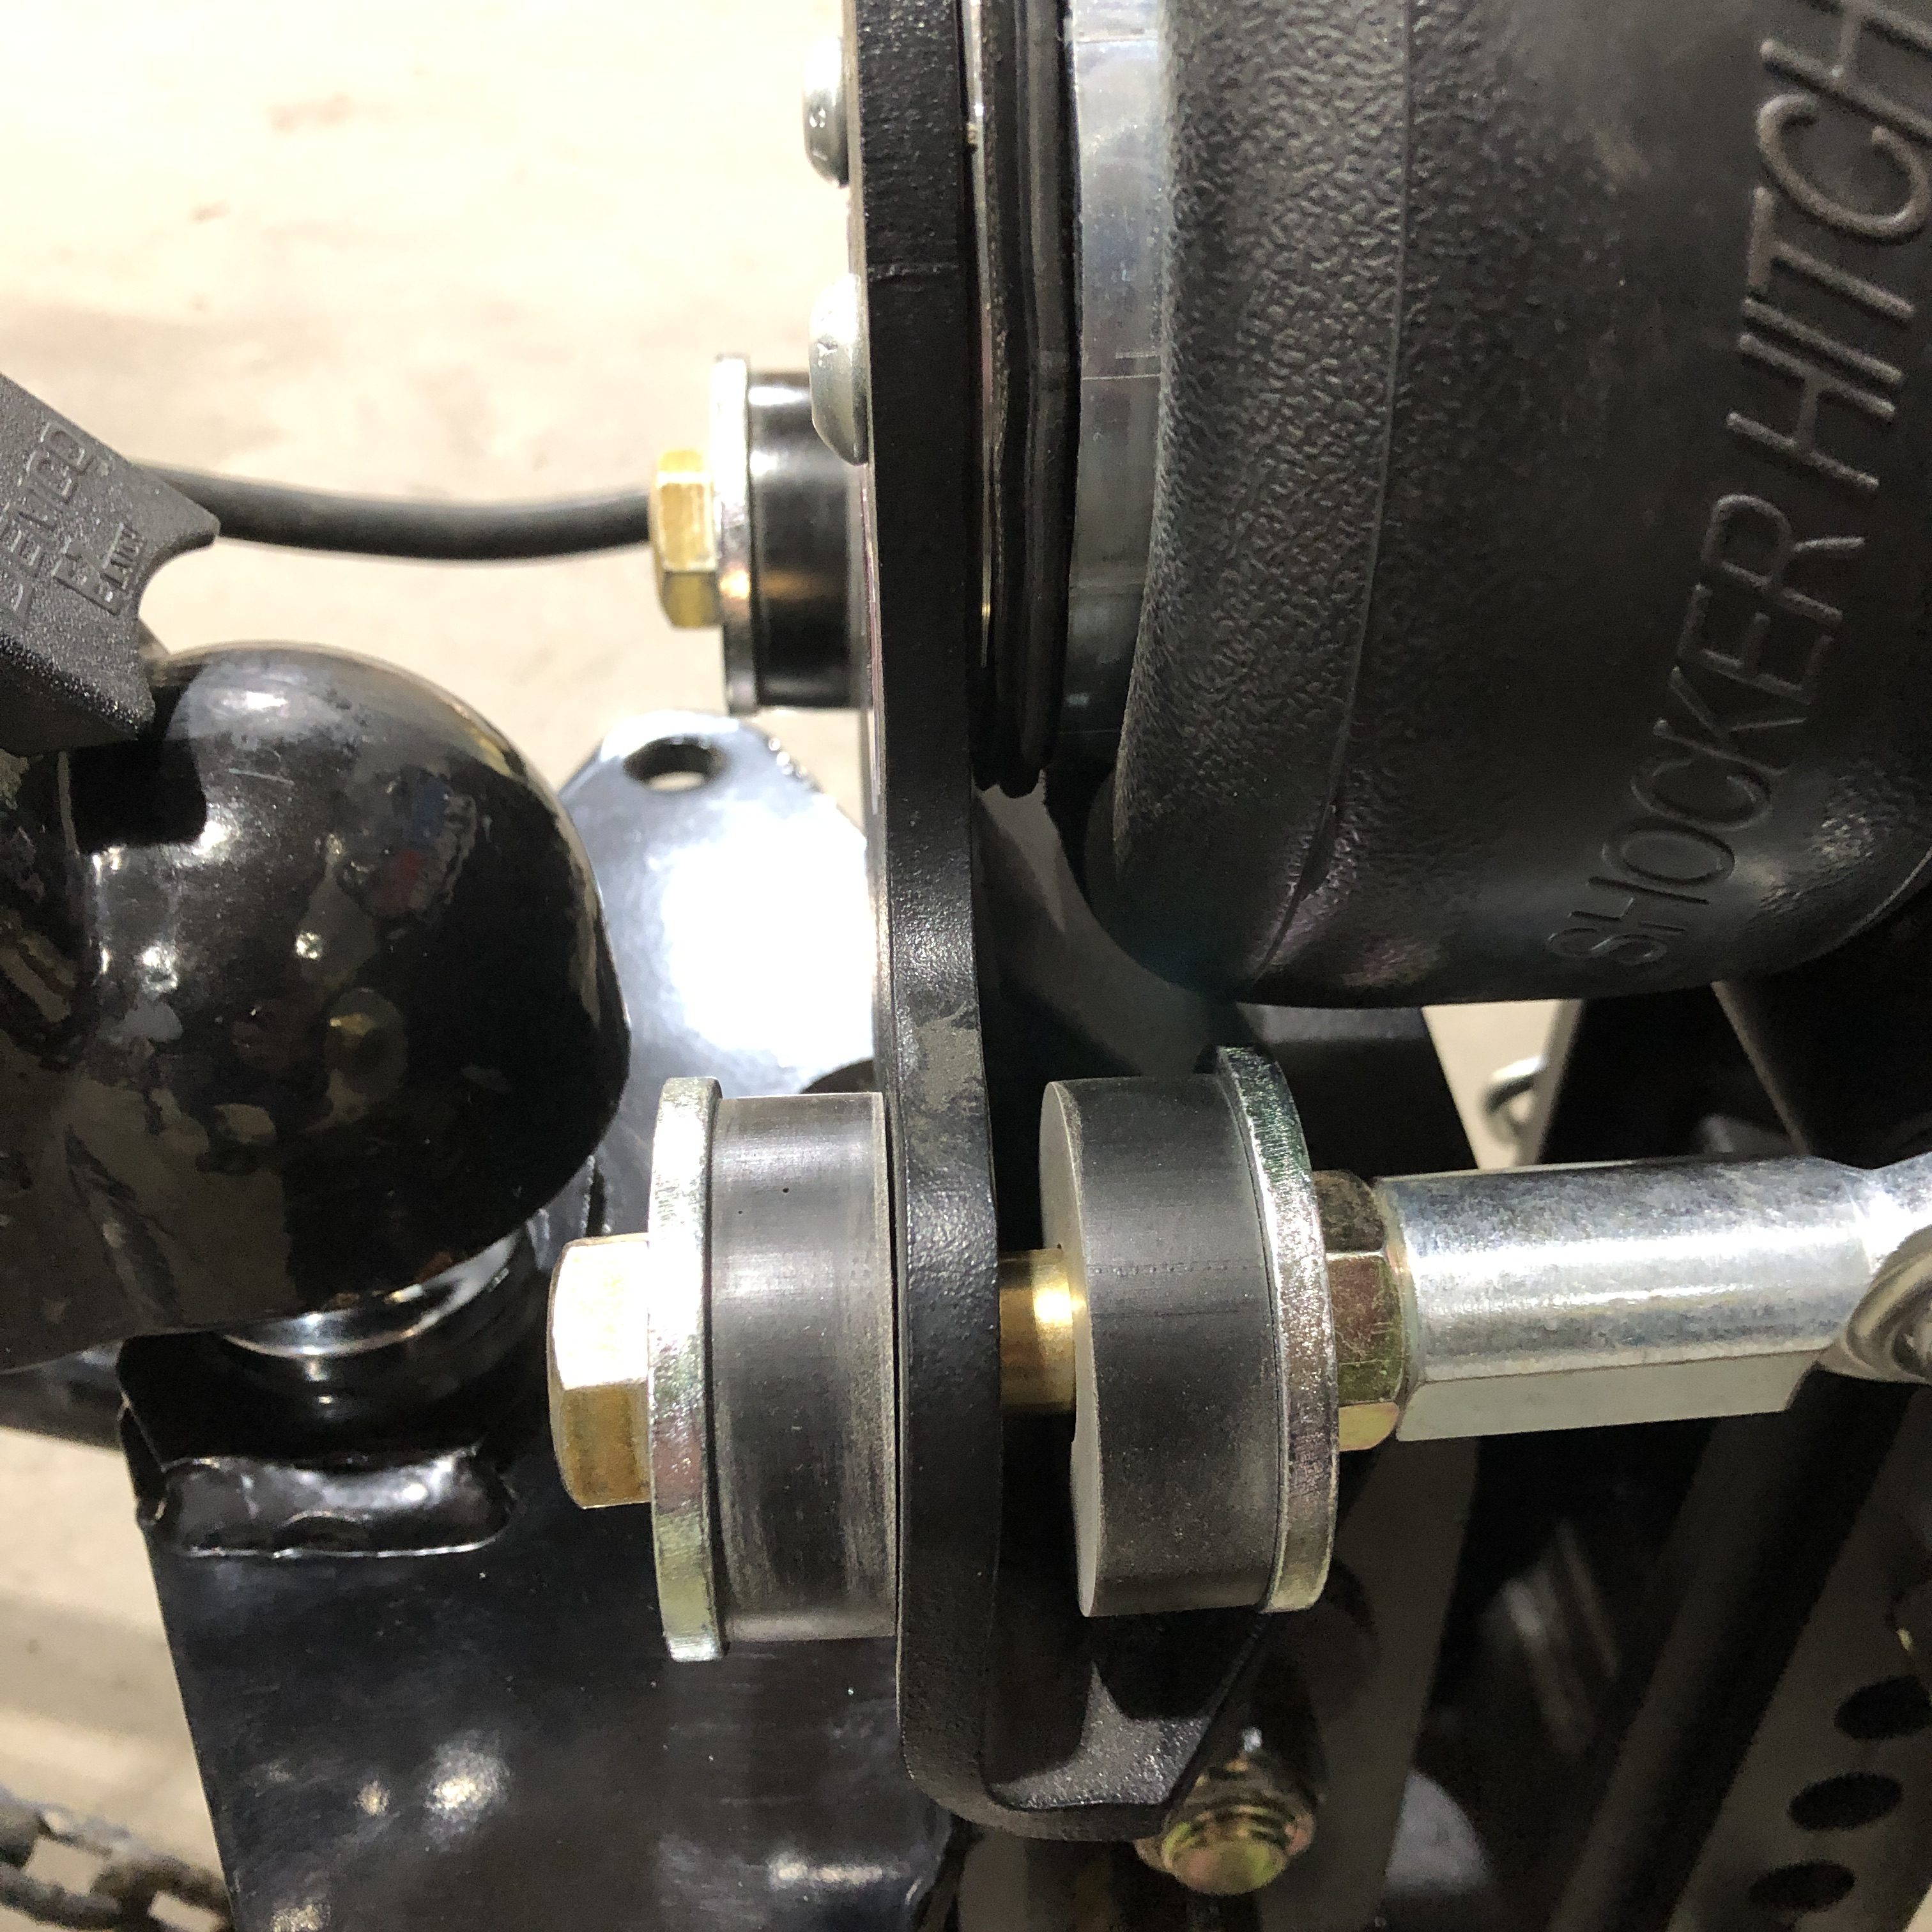
Load and secure the trailer as it will be towed, then couple it to the tow vehicle on level ground. Add air until the black bump stops contact the black-painted tabs on the hitch frame OR the split lock washers are compressed flat.
Recheck the air pressure whenever the trailer load changes. For older or unidentified tongue mounts, confirm the applicable installation instructions with Shocker Hitch. Watch the tongue-mount video below.
Trailer tongue air mount installation guide →
Back to model selector ↑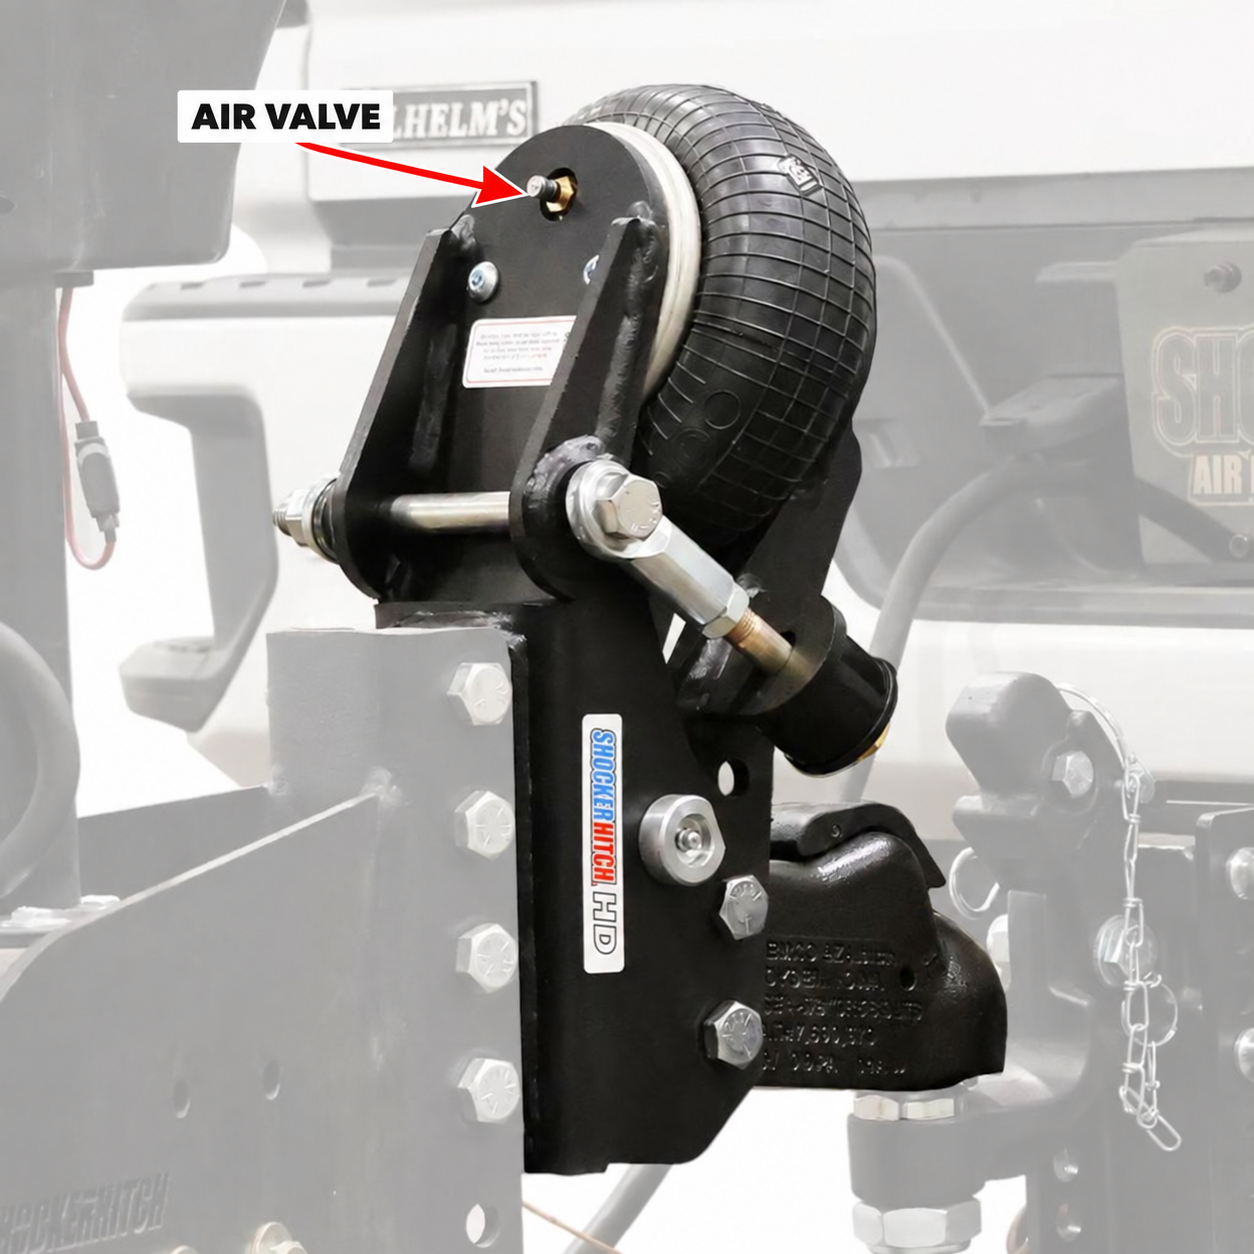
Model-specific setup
Trail Force® receiver hitch air pressure
Set the air pressure
Add air until the top of the hitch frame touches the top, tailgate-side bump cushion—the cushion closest to your bumper.
The air valve is on the bottom side of the air bag. Add or remove air when towing a heavier or lighter trailer.
Trail Force® receiver hitch installation guide →
Back to model selector ↑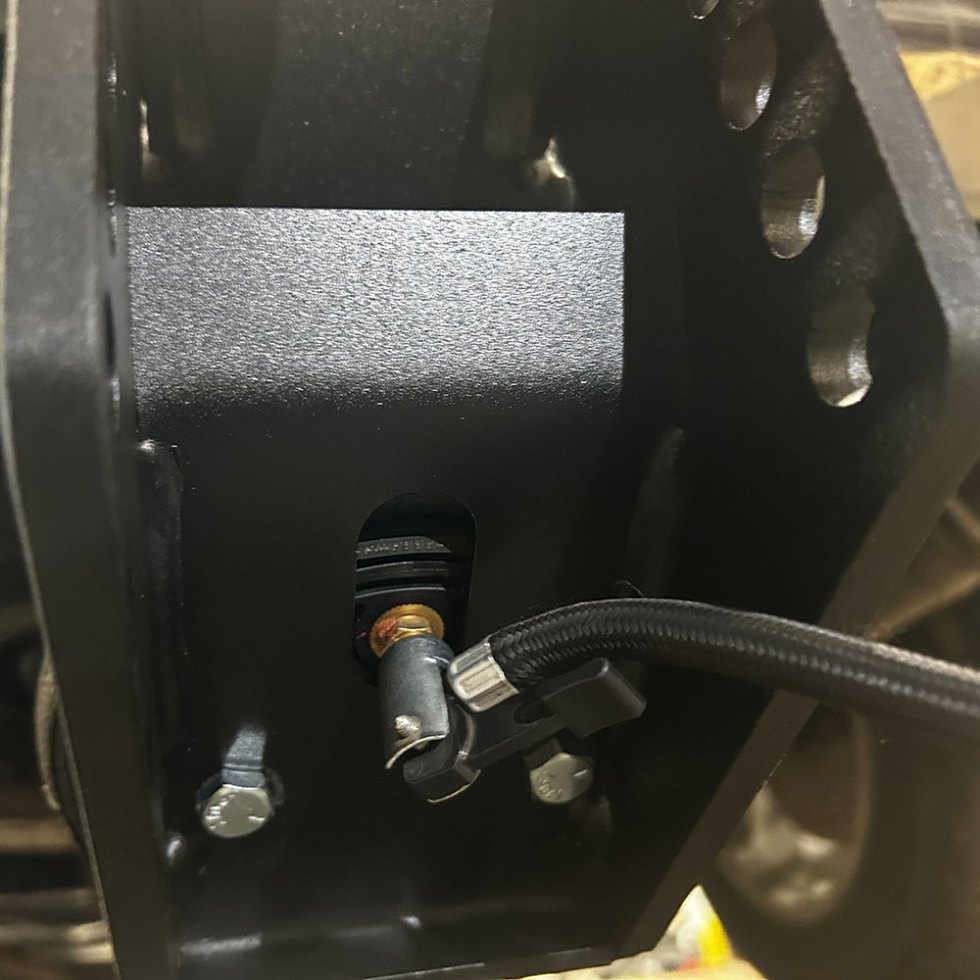
8K Sport™
Sport™ air receiver hitch air pressure
Set the air pressure
Add air until the hitch frame touches the top front, tow-vehicle-side bump cushion—the cushion closest to your bumper.
The air valve is underneath the air receiver hitch. Add or reduce air when towing a heavier or lighter trailer.
Sport™ air receiver hitch installation guide →
Back to model selector ↑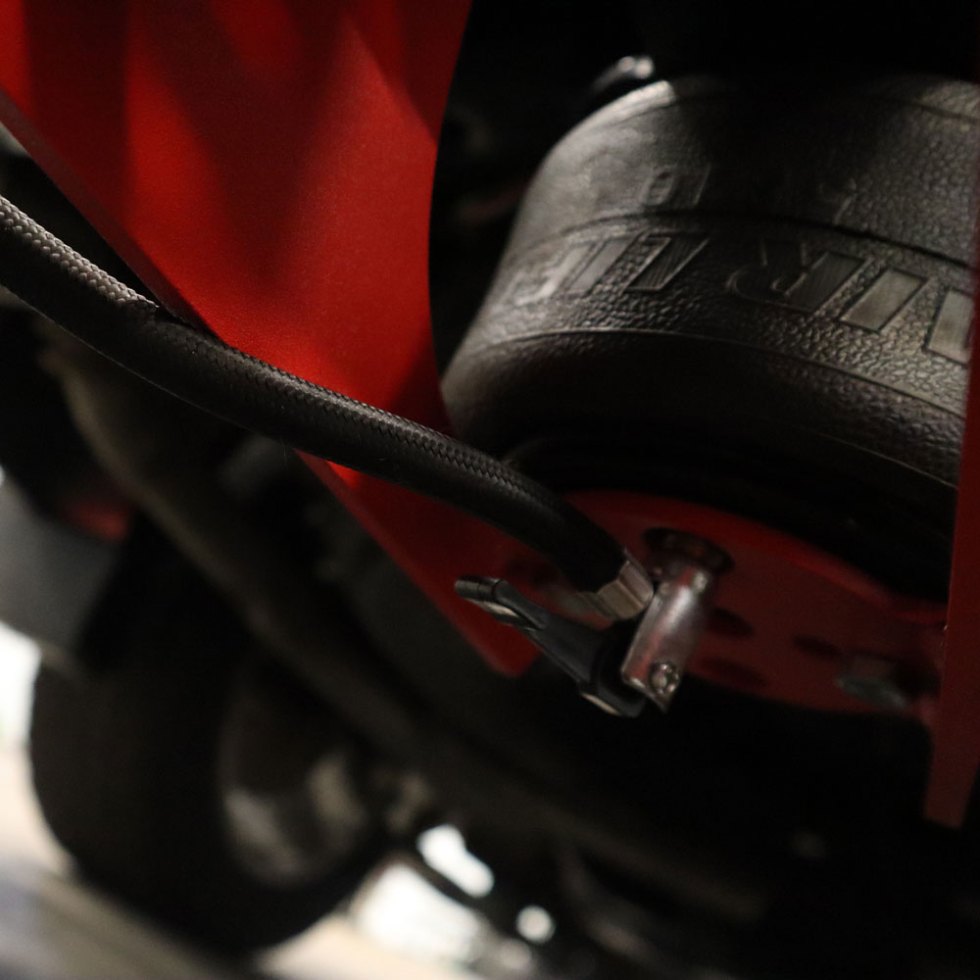
Weight-distribution setup
Air Equalizer air pressure
Set the air pressure
Attach the trailer and set the weight-distribution load bars according to the installation guide first. Add air until the main frame just touches the bump cushions closest to the trailer and the forward washers closest to the truck free up.
Use cushion position to confirm the setting; 40–60 PSI is an average reference, not a required target. Stop at light contact—do not compress the trailer-side bump cushions.
Air Equalizer installation guide →
Back to model selector ↑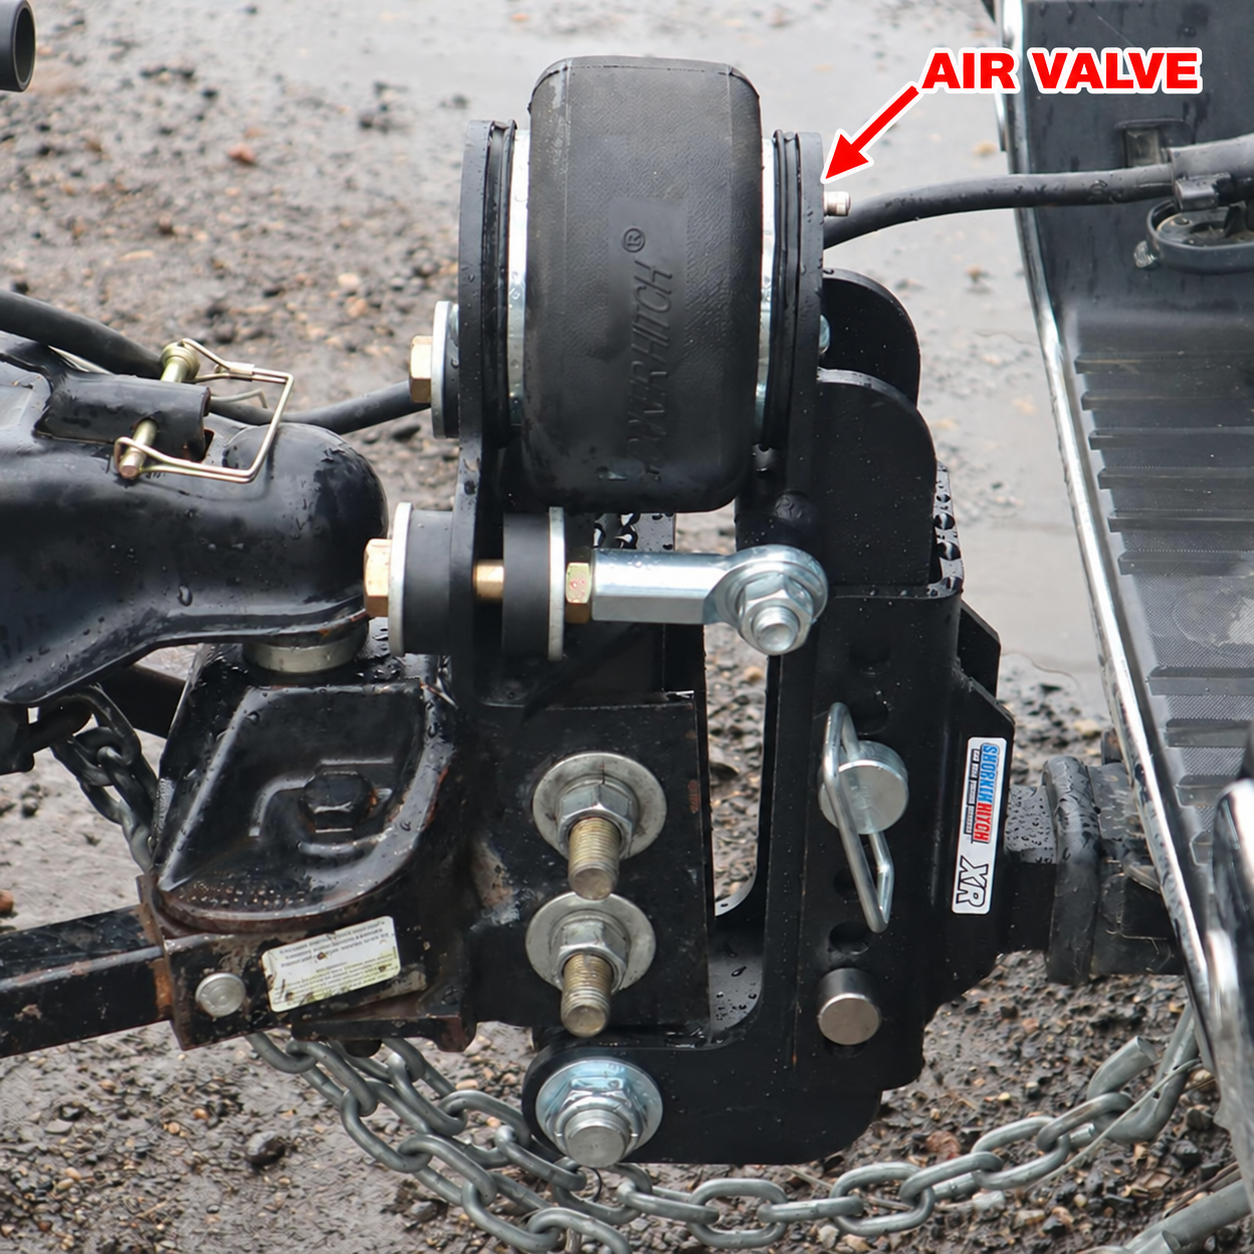
Conversion hitch
Quick Air® fifth-wheel to gooseneck air pressure
Set the air pressure
A lighter fifth-wheel camper may need as little as 15 PSI; a heavier camper may need 25–35 PSI. The setting depends on trailer weight.
Fine-tune in 5 PSI steps for ride and load control. Use the instructions for your exact conversion setup.
Quick Air® fifth-wheel to gooseneck installation guide →
Back to model selector ↑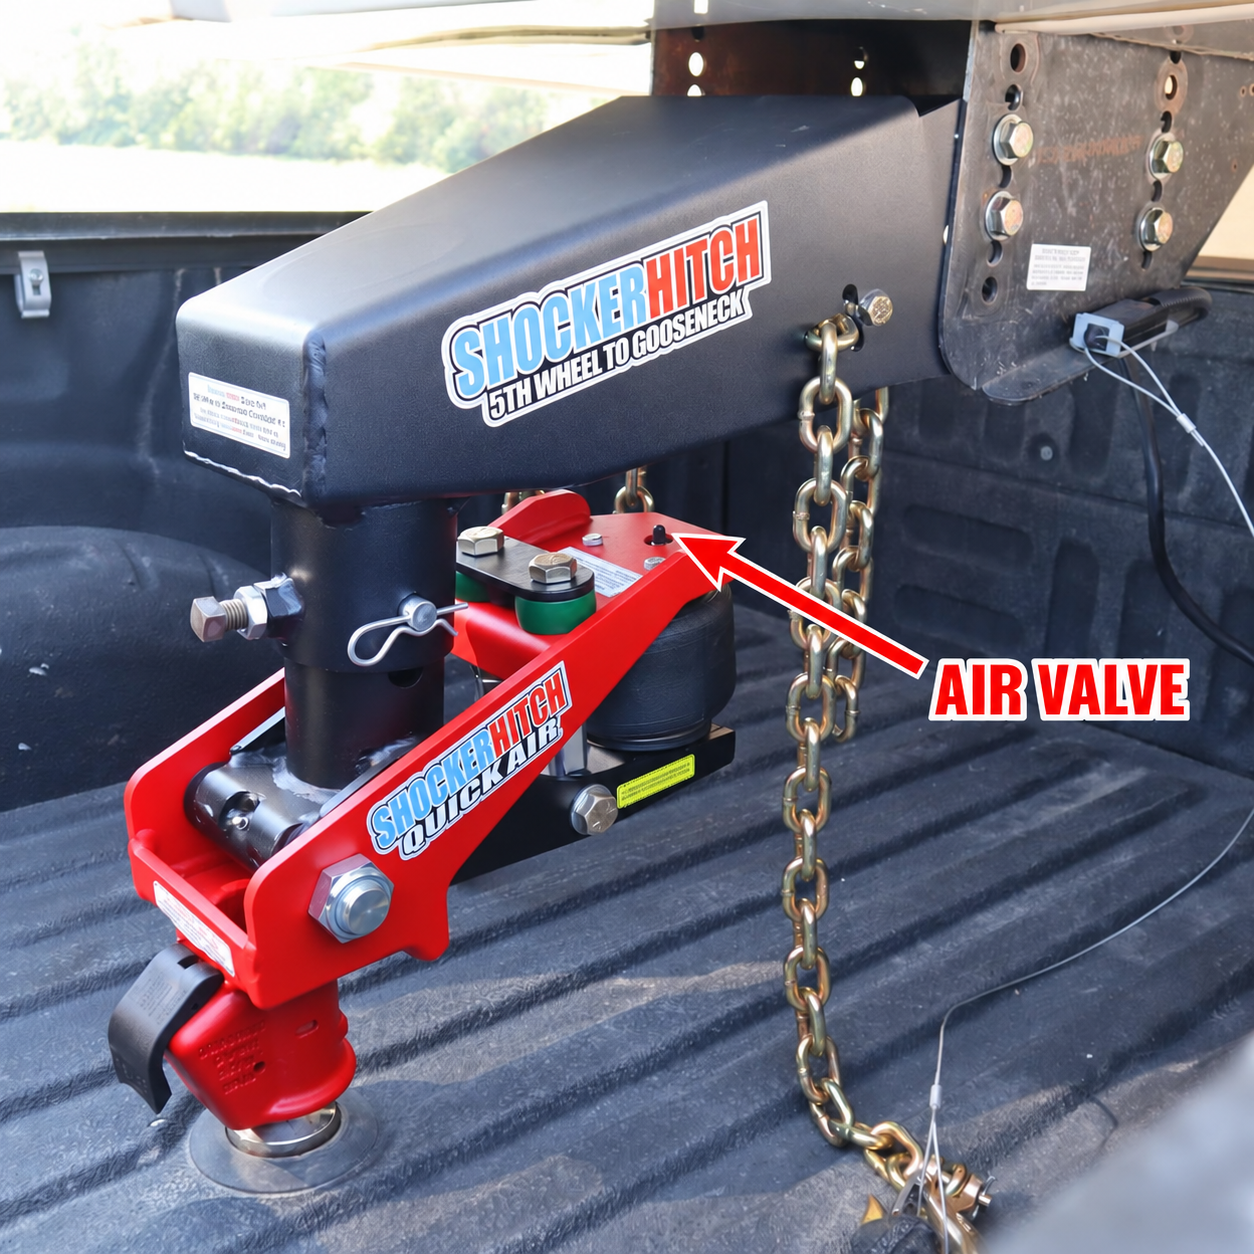
Fifth-wheel connection
Quick Air® pin box with kingpin air pressure
Set the air pressure
Typical pressure is 15–25 PSI, depending on trailer weight. Add air for a heavier trailer and reduce it for a lighter trailer.
The air valve is at the bottom of the pin box toward the rear. Fine-tune in 5 PSI steps for ride and load control.
Quick Air® pin box with kingpin installation guide →
Back to model selector ↑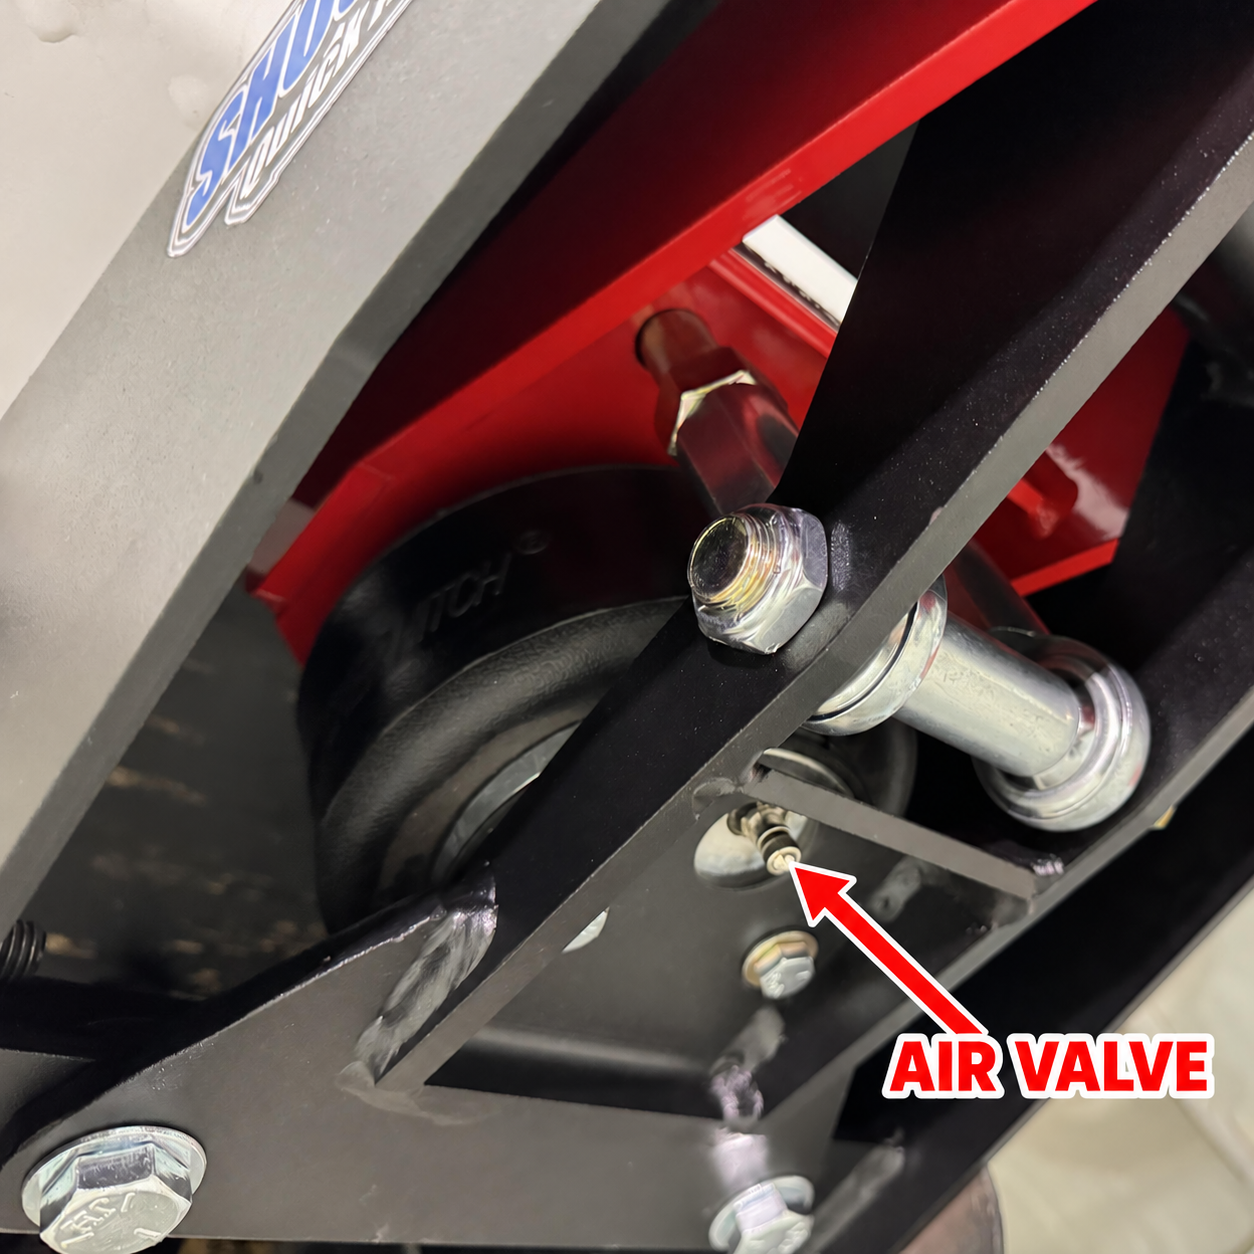
Air pressure questions
Is there one correct PSI for every Shocker Hitch?
No. The setting depends on your model and trailer load. Use the bump-cushion position or PSI guidance in your model’s section, then follow its installation instructions and pressure limits.
Should I adjust the pressure when my load changes?
Yes. Recheck your setting when switching trailers or changing the load. Adjust the pressure using the guidance for your specific hitch.
Where do I connect the air hose?
Use the air inflation valve shown in your model’s photo or setup video. Valve locations vary by hitch. The annotated photos mark the valve with an arrow.
What if my air hitch is losing pressure?
See our air-pressure loss troubleshooting guide. If you need help identifying the issue, contact our team with your model and a photo of the setup.
More help: Air-pressure loss troubleshooting · Towing checklist · All towing tips