

Check out the video below or download the instructions for Replacing Bump Cushion Assembly on Shocker Hitch.
Replacing Bump Cushion Assembly on Shocker Air Bumper Hitch
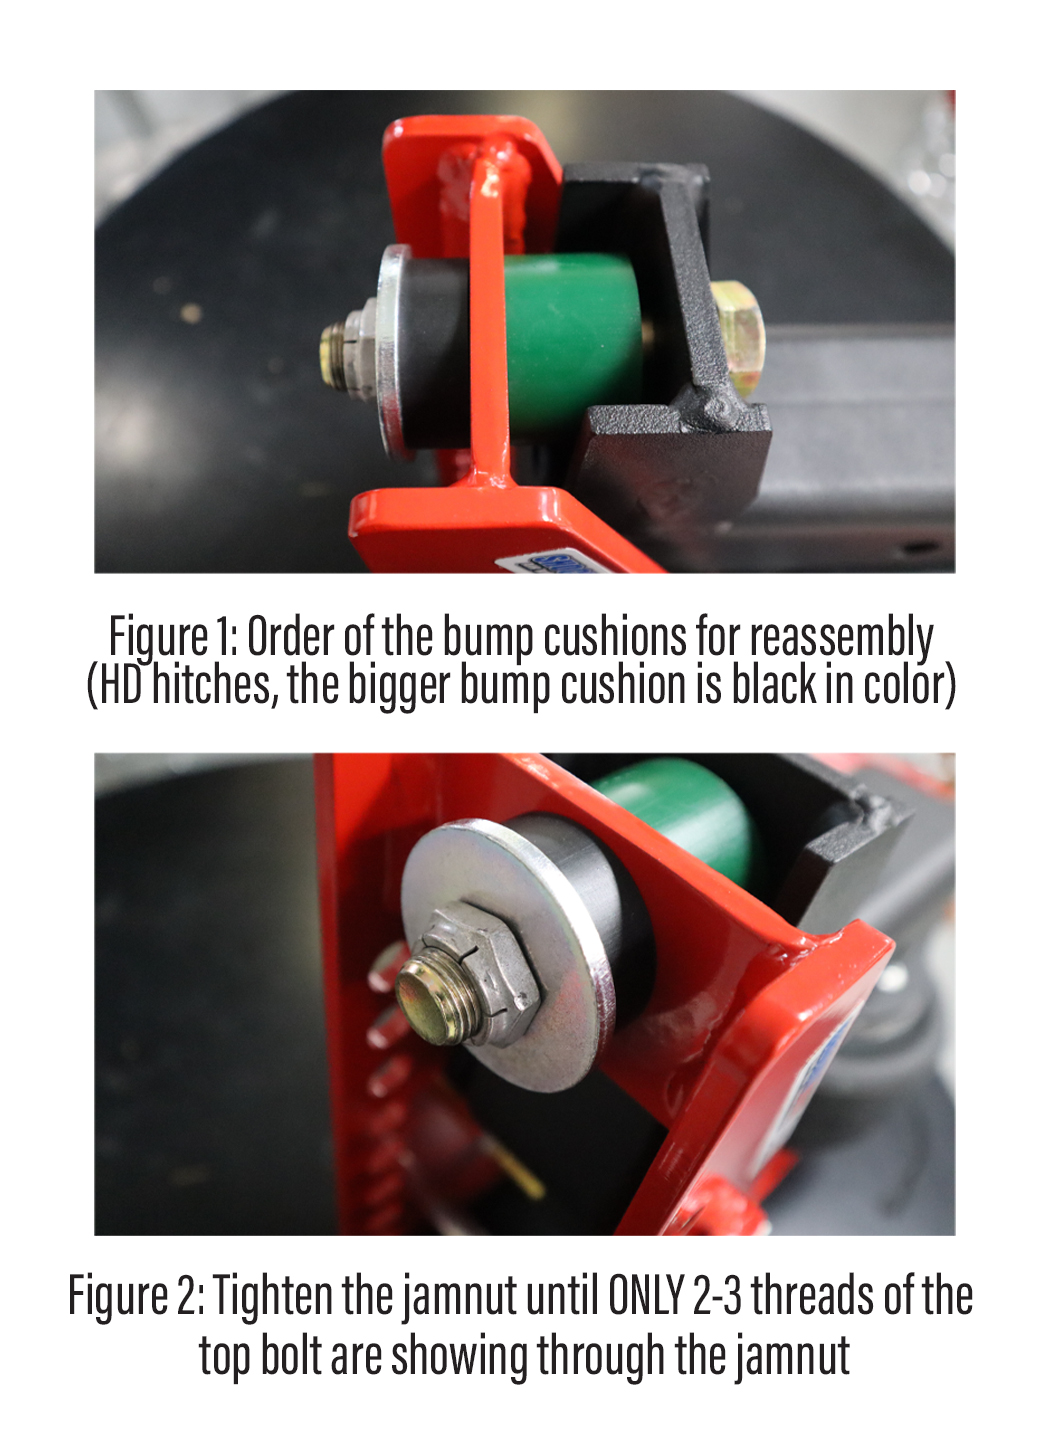
•Start by loosening the jamnut from the top bolt using a 1-1/8” wrench on the bolt head and an impact wrench with a 1-1/16“ socket (or equivalent) on the jamnut. Once loosened, pull the bolt, bump cushions, and washer apart from the main hitch frame, set hardware aside for later installation.
•Assemble the bump cushion assembly by inserting the top bolt through the backside of the receiver shank and hitch frame, be sure to insert the bigger bump cushion between the receiver shank and main hitch frame, then slide the bolt through. Continue by sliding the smaller bump cushion over the bolt on the front side of the hitch frame, slide the washer over, add a small amount of thread lock to the jamnut, and finger thread the jamnut (see Figure 1 for reference).
•Finish by tightening the jamnut using a 1-1/8” wrench on the bolt head and an impact wrench with a 1-1/16“ socket (or equivalent) and tighten until there are 2-3 threads of the bolt showing the other side (see Figure 2). NOTE: The receiver shank frame should be perpendicular with the hitch frame.
•IMPORTANT: DO NOT over tighten the jamnut on the bump cushion assembly past 2-3 threads, this can prevent the hitch from pivoting and prevent the hitch from functioning properly.
Replacing Bump Cushion Assembly on Shocker Air Bumper Hitch
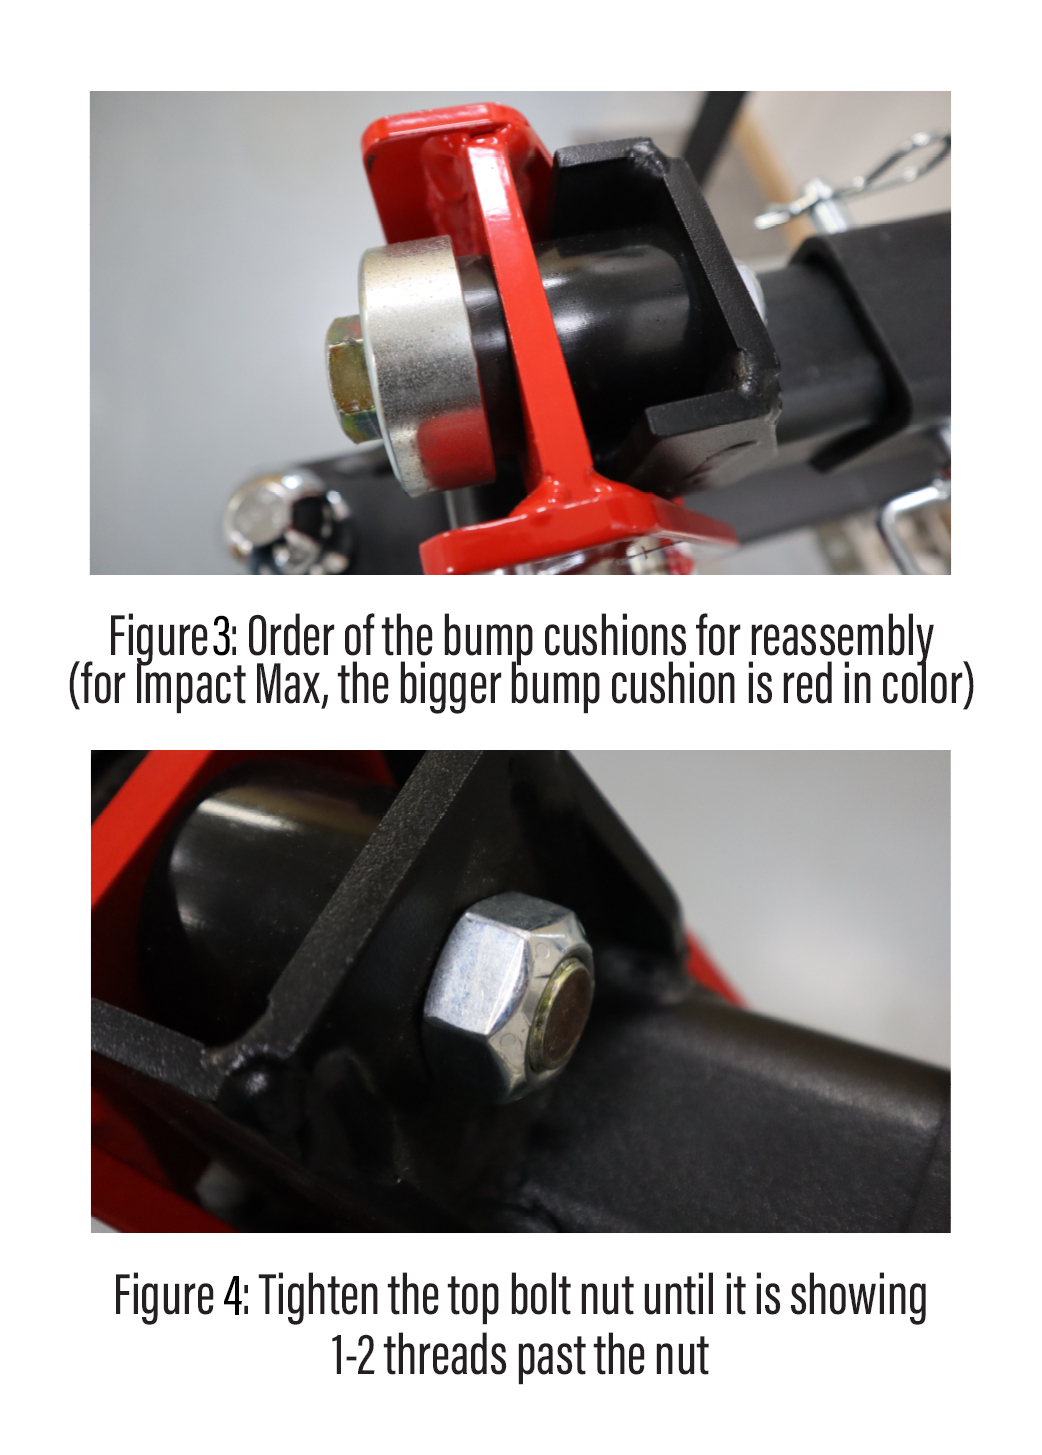
•Start by loosening the rear nut from the top bolt using a 1-1/8” wrench on the bolt head and an impact wrench with a 1-1/8“ socket (or equivalent) on the nut. Once loosened, pull the bolt, cap, and bump cushions apart from the main hitch frame, set hardware aside for later installation.
•Assemble the bump cushion assembly by inserting the smaller bump cushion into the cap and inserting the top bolt through the smaller bump cushion and cap. Continue by inserting the bigger bump cushion between the receiver shank and main hitch frame, then slide the bolt with the preassembled smaller bump cushion and cap through the front of the hitch frame and bigger bump cushion, add a small amount of thread lock to the rear nut, then finger thread the rear nut onto the bolt (see Figure 3 for reference).
•Finish by tightening the jamnut using a 1-1/8” wrench on the bolt head and an impact wrench with a 1-1/8“ (or equivalent) socket and tighten until it is showing 1-2 threads past the nut (see Figure 4). NOTE: The receiver shank frame should be perpendicular with the hitch frame.
•IMPORTANT: DO NOT over tighten the nut on the bump cushion assembly, this can prevent the hitch from pivoting and prevent it from functioning properly.
Downloadable PDF
Replacing Bump Cushion Assembly on Shocker Hitch.
Video of How To Replace Bump Cushion Assembly on Shocker Hitch
Coming soon